

How to grow peppers in containers is one of those questions that sounds simple until you try it and the plant sits there, small and sulky, while a neighbour’s pepper is covered in fruit. The good news is that peppers are genuinely well suited to pots. They like warmth, they like well-drained roots, and they are compact enough for a balcony, patio, or the sunniest corner of a small garden. When a pepper struggles in a container, the reason is usually easy to spot once you know what to look for: the pot was too small, the plant went outside too cold and too early, or it was left thirsty during the hottest weeks.
Peppers reward patience at the start and consistency in the middle of the season. They grow slowly as seedlings, they dislike cold nights far more than tomatoes do, and then, once the weather is properly warm, they settle in and produce steadily for months. A container gives you real advantages here. You can start the plant in the warmest spot you have, move it to follow the sun in spring and autumn, and bring a favourite plant under cover when an early cold snap threatens in fall. You also control the growing mix completely, which matters because peppers hate sitting in heavy, waterlogged soil.
This guide walks through the whole season in order: which types do best in pots, how big a container you actually need, what to fill it with, how and when to start seeds indoors, how to transplant without a setback, and the day-to-day care of watering, feeding, and staking that keeps fruit coming. There is also a short note at the end on overwintering, because a pepper plant is technically a short-lived perennial in frost-free conditions, and saving a good plant can give you a head start next year.
Choosing Pepper Varieties That Do Well in Pots
Almost any pepper can be grown in a container if the pot is large enough, but some types make the job much easier. The first split to understand is between sweet peppers, including bell peppers, and hot peppers such as chillies. As a rough rule, hot peppers are the more forgiving pot crop. Many chilli plants are naturally compact, they tolerate a slightly smaller pot, and they often keep producing even when conditions are not perfect. Bell peppers are fussier. The plants are larger, the fruit is heavier, and a stressed plant will drop blossoms or give you small, thin-walled fruit. That does not mean you should skip bells in pots. It means you should give them the biggest pot and the sunniest spot you have.
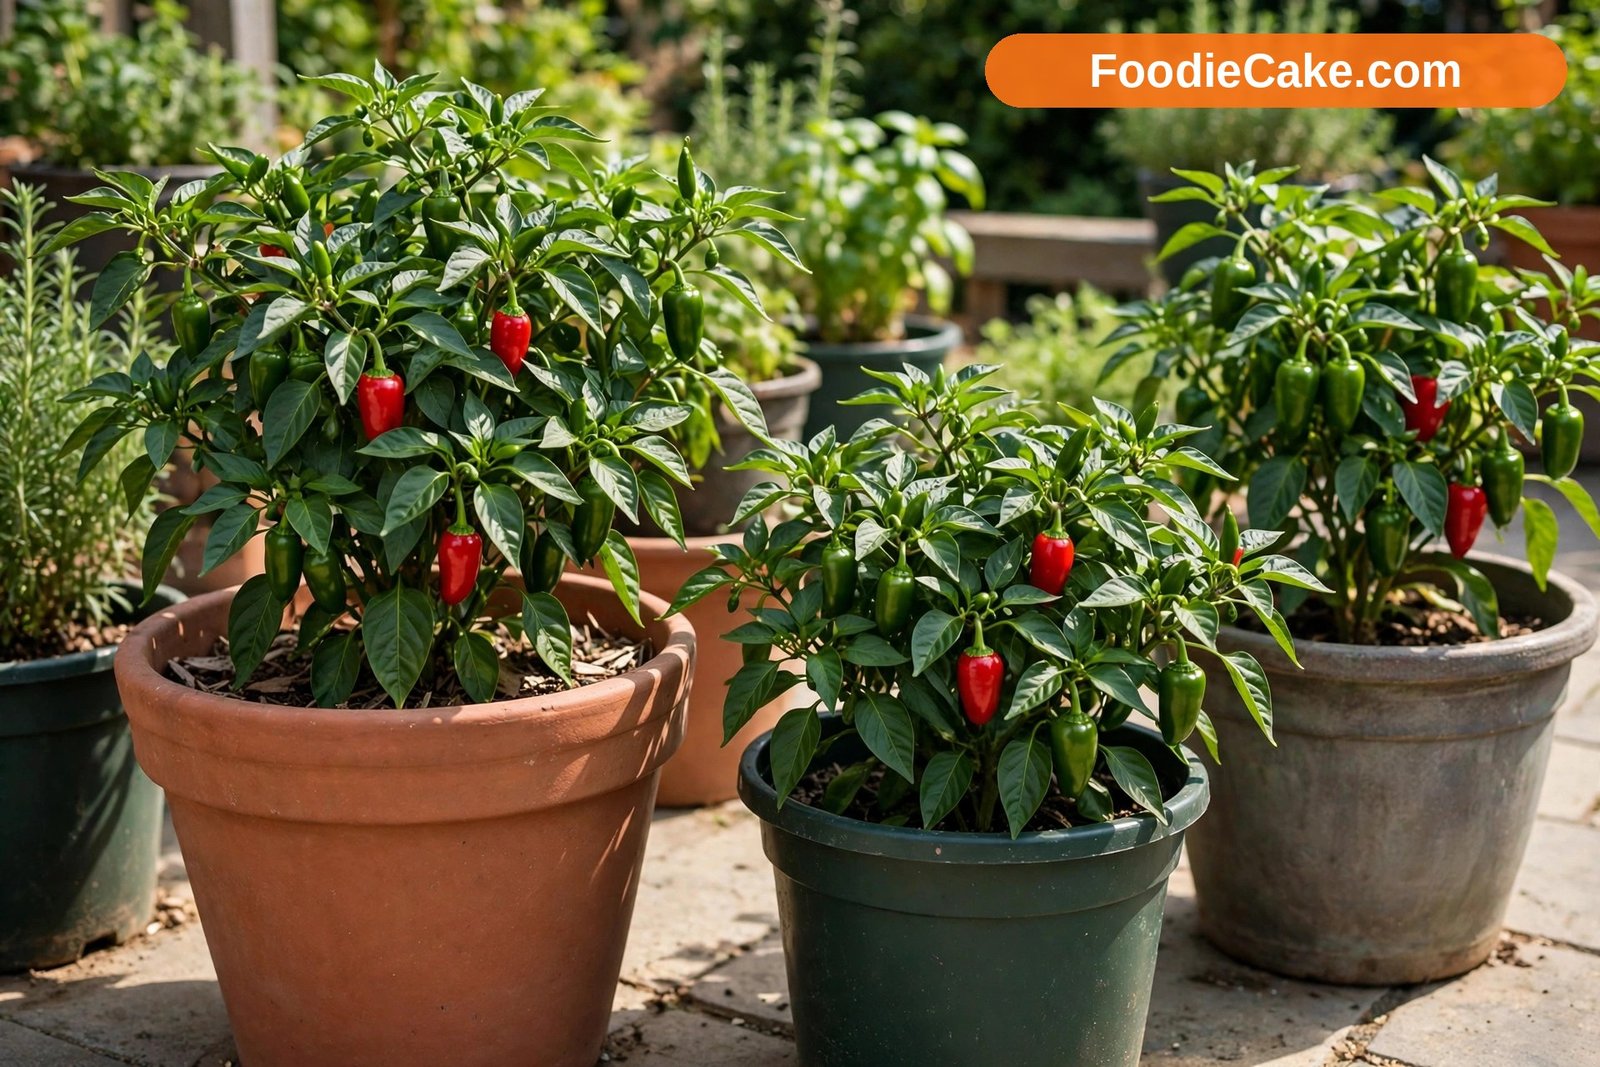
For hot peppers, jalapeño is a reliable starting point. It is productive, the plant stays a manageable size, and the fruit is useful fresh, pickled, or cooked. Serrano produces heavily on a slightly taller plant. Cayenne types are slender, dry well, and handle pots happily. Habanero and Scotch bonnet types are slower and need a long, warm season, so they suit zones 8 to 10 best outdoors, or gardeners elsewhere who start seed very early indoors. If space is tight, look for varieties bred specifically for containers. ‘Patio Firehouse’ is a good example of this compact type: a small, tidy plant bred for pots that still produces plenty of hot fruit. Seed catalogues list similar patio and dwarf chillies every year, described as compact, container, or balcony types, and those descriptions are worth trusting. A plant bred to stay small will outperform a sprawling variety crammed into the same pot.
For sweet peppers, standard bell varieties such as California Wonder can work in a large container, but varieties selected for smaller plants or earlier fruiting tend to do better where the season is short. Mini bell types, lunchbox-style snacking peppers, and compact sweet varieties give you more fruit per plant in a pot and ripen faster than big blocky bells, which is a real advantage in zones 5 to 7 where fall arrives while large bells are still green. Banana peppers and Italian frying types such as Cubanelle are also productive in pots and less demanding than classic bells. If you are choosing just two pots for a first attempt, a sensible pairing is one jalapeño and one compact sweet pepper. You get heat and sweetness, and you will quickly learn how differently the two types behave.
Check the seed packet for days to maturity, and count carefully. Peppers are slow. A variety that needs a long run from transplant to ripe fruit may only give you green peppers in a cool climate unless you start early. Green fruit is perfectly edible, of course, but if ripe red or orange peppers are the goal, choose an earlier variety and start seed on the early side of the window described below. Height matters too. A variety listed as tall will need staking and a heavier pot that does not topple in wind.
Choosing a Container: Size, Material, and Drainage
Pot size is the decision that shapes everything else. As a minimum, allow 3 to 5 gallons of growing mix per plant, and treat 5 gallons as the honest working minimum for most types. A compact chilli can manage in a 3-gallon pot if you water carefully, but it will dry out fast in hot weather and the harvest will be smaller. A bell pepper really wants 5 gallons at the very least, and 7 to 10 gallons will give you a sturdier plant, more even moisture, and better fruit. One plant per pot is the safest plan. Two small chillies can share a wide 10-gallon container, but crowding two bell peppers into one pot is a common false economy. They compete for water and food all season and both produce less.
Depth counts as well as volume. Choose a pot at least 25 to 30 cm deep so the roots have room to grow down and the plant anchors well. A wide, shallow bowl is a poor choice even if it holds the same amount of mix, because it dries unevenly and gives a top-heavy plant little stability.
Drainage is not optional. The container must have holes in the base, and those holes must be able to drain freely. Peppers like regular water, but their roots rot in mix that stays saturated. Stand the pot on small feet, bricks, or a tray that lets excess water escape, rather than letting it sit permanently in a full saucer. If you are growing on a balcony and need to catch run-off, empty the saucer after watering instead of leaving the pot standing in it. You do not need a thick layer of gravel in the bottom of the pot. Clear holes and a free-draining mix do the job far better.
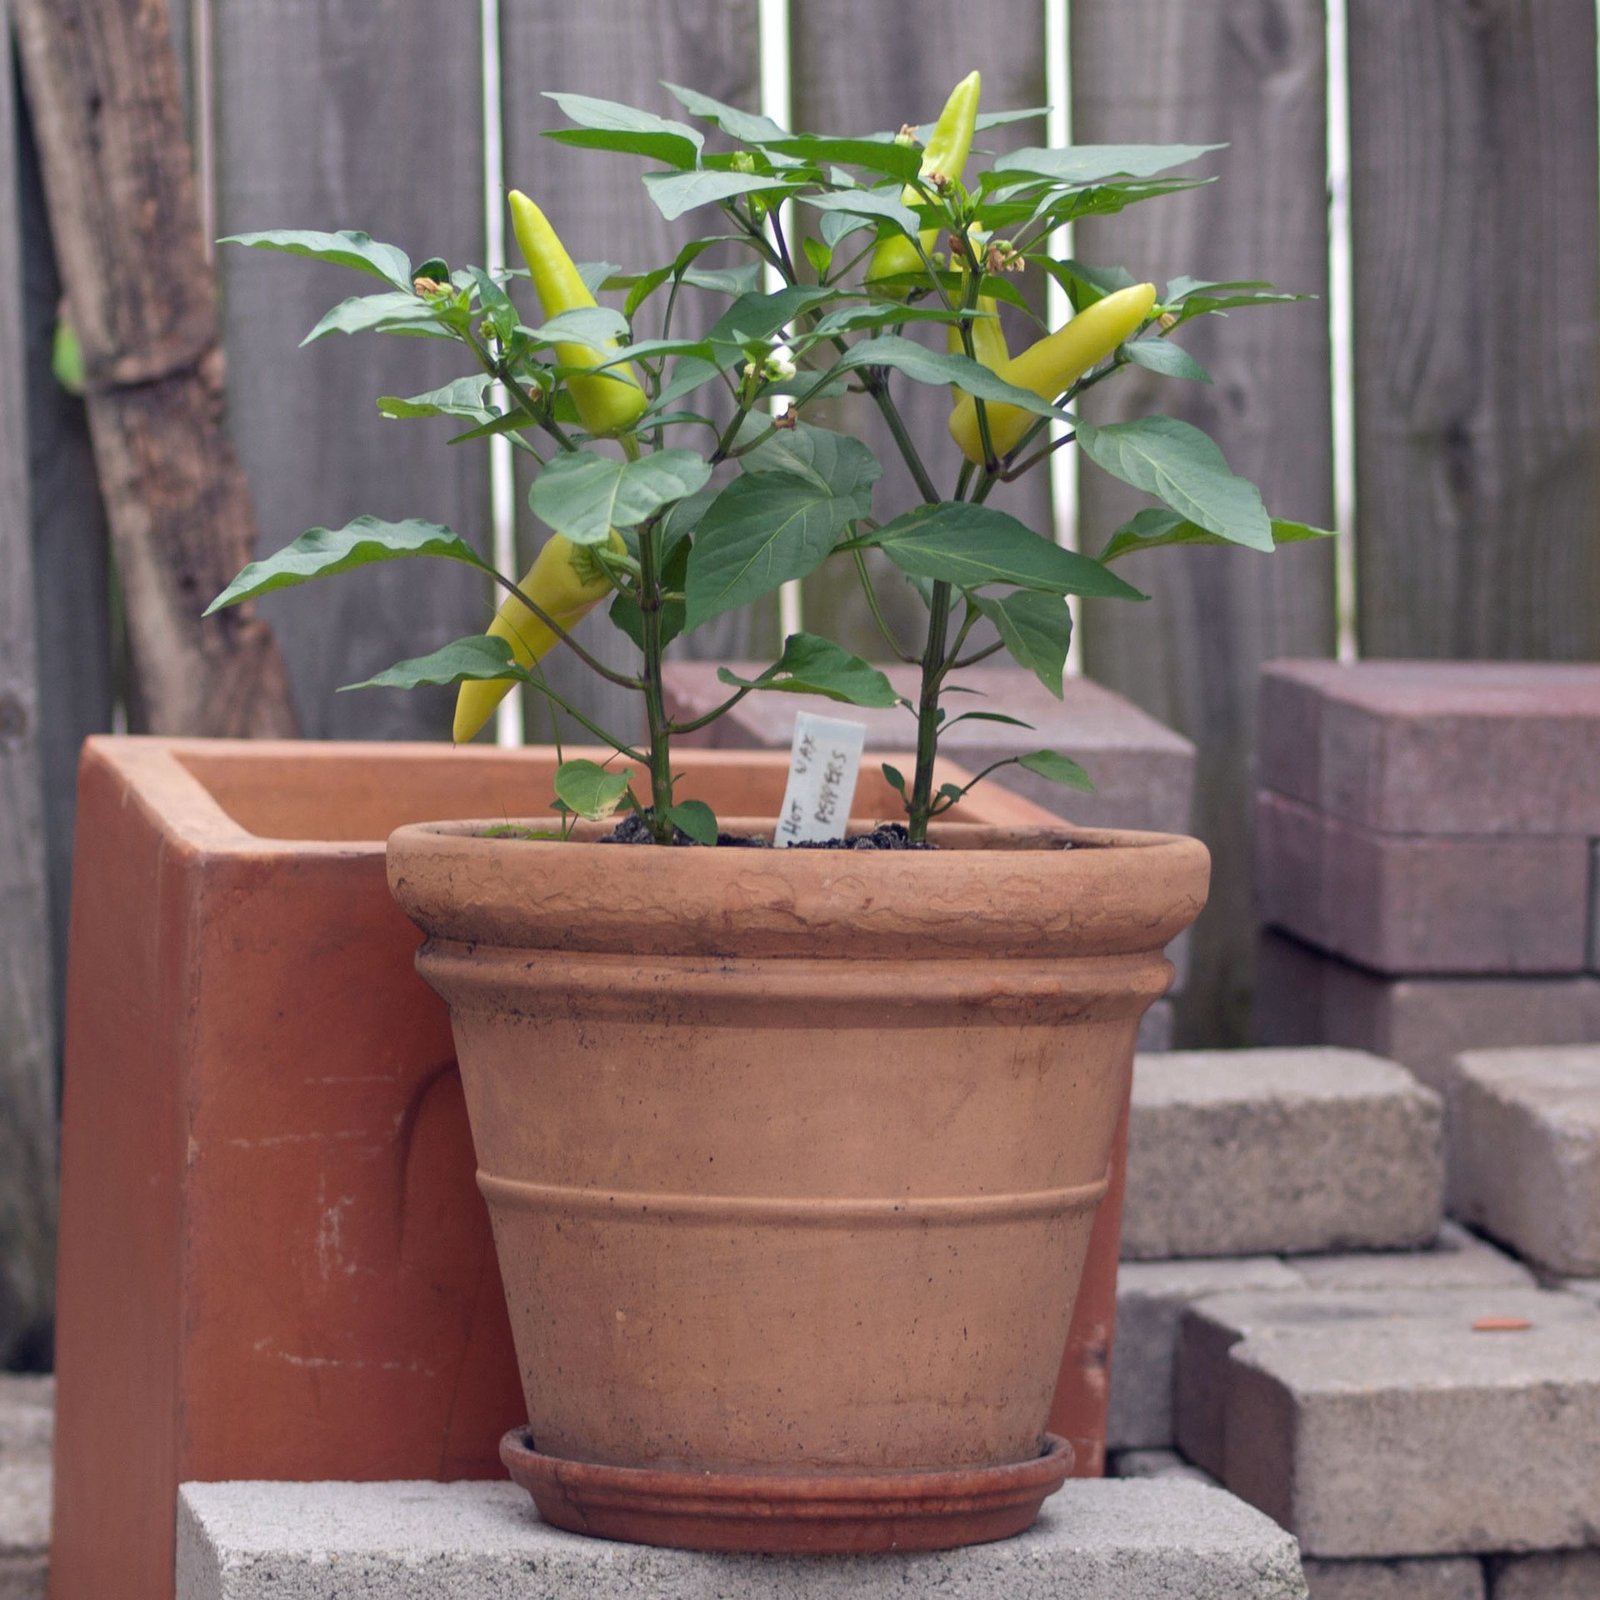
Material changes how the pot behaves. Terracotta is stable and looks good, but it loses moisture through its walls and dries fastest, so expect to water more often. Plastic holds moisture longer and is lighter, which matters when a filled 7-gallon pot is heavy enough that you will not want to move it often. Fabric grow bags drain freely, keep roots healthy with natural air-pruning at the edges, and are easy to store, but they dry out faster than plastic and need closer attention in a heatwave. Dark pots in fierce sun can get very hot around the root zone. In a hot climate or a sun-trap patio, a light-coloured pot helps, or you can shade just the pot itself while the leaves stay in full sun. Whatever you choose, fill and position the pot where it will live for the season. Moving a large, wet, fruiting pepper in midsummer is nobody’s idea of fun.
If you are setting up several containers at once, it helps to think about the layout as a group rather than one pot at a time. Our guide on how to start a container garden covers arranging pots for light, water access, and weight on balconies, which is worth reading before you fill anything heavy.
The Right Potting Mix, and Why Garden Soil Fails in Pots
Fill the pot with a good-quality potting mix, not with garden soil dug from a bed. This point is worth stressing because it causes so many quiet failures. Garden soil behaves very differently in a container. It compacts into a dense mass, drains poorly, holds either too much water after rain or bakes hard between waterings, and it can bring weed seeds and soil-borne disease into the pot with it. Even good garden soil that grows fine peppers in open ground will disappoint you in a container. A bagged potting mix is made for exactly this job: it holds moisture and air at the same time, so roots can drink and breathe together.
Look for a peat-free or peat-based multi-purpose potting mix with a loose, open texture. If the mix feels heavy and clings in a wet lump, blend in some perlite to open it up. Mixing in a few handfuls of garden compost or well-rotted manure improves moisture holding and adds a gentle background of nutrients, and that is a good habit for hungry crops like peppers. A handful of slow-release general fertiliser mixed through at planting time, used at the rate on the product label, gives the plant a steady start without the risk of a strong dose burning young roots.
Fill the pot to a few centimetres below the rim. That gap stops water and mix washing over the side every time you water, and it leaves space for a mulch layer later in the season. Water the filled pot thoroughly once, let it drain, and top up the level if the mix settles, because it usually does. Starting with evenly moist mix makes transplanting easier and gives the young plant a much calmer first week. Do not reuse last year’s potting mix for peppers if you can avoid it. Used mix is depleted, compacted, and can carry disease over from a previous crop. Old mix can go on the garden or into the compost heap instead.
Starting Seeds Indoors, 8 to 10 Weeks Before the Last Frost
Peppers need a long season, and in most climates that means starting seeds indoors. The standard timing is 8 to 10 weeks before your last expected frost date. Hot and slow types, such as habanero, benefit from the early end of that window or even a little sooner. Sweet bells and fast chillies sit comfortably in the middle. Starting much earlier than that without strong light gives you leggy, weak seedlings that struggle after transplanting, so resist the urge to sow in the depths of winter just because the seed packet is sitting there.
Warmth is the key to germination. Pepper seeds are notoriously reluctant in cool conditions. They germinate best in warm compost, roughly in the range of 24 to 29°C, and at the lower end of normal room temperature they can take three weeks or more, with some seeds never appearing at all. This is why peppers have a reputation for being difficult from seed when the real problem is simply a cold windowsill. A heated propagator is ideal, but the top of a fridge, a warm airing cupboard for the first days, or any reliably warm spot in the house works. Check daily. As soon as seedlings appear, they need light straight away, so be ready to move them.
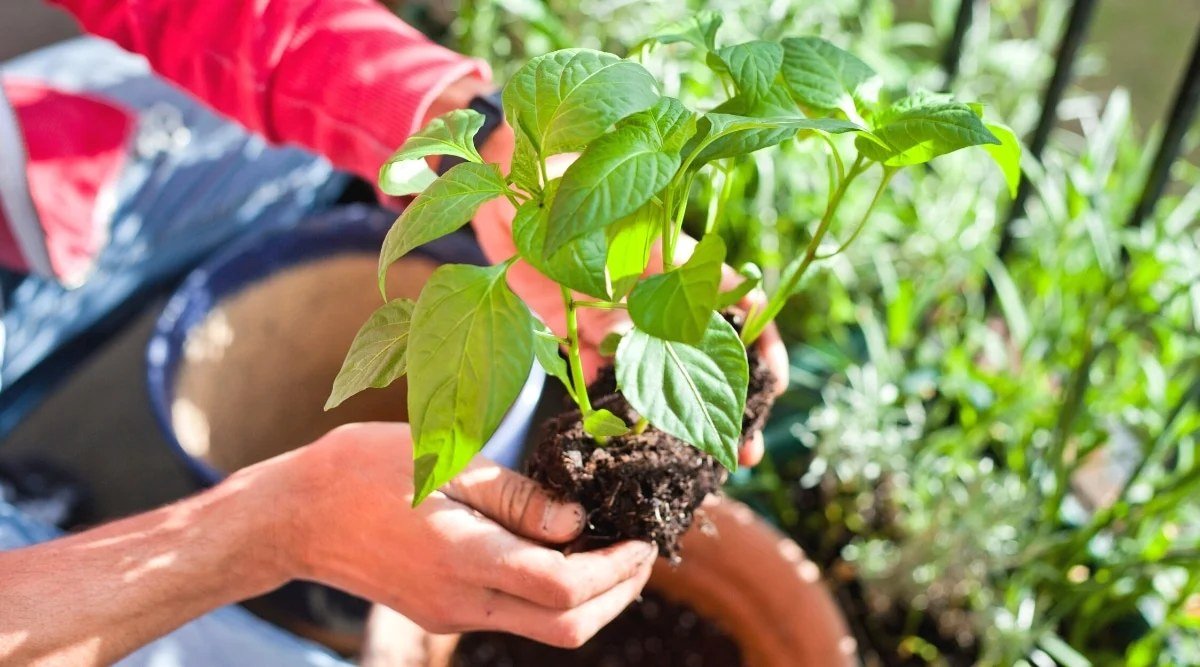
Sow seeds about 5 mm deep in small pots or cells of seed compost, two seeds per cell if your seed is old, and keep the compost moist but not wet. A clear lid or cover holds humidity during germination, but lift it once seedlings emerge so air can move. Light is the next challenge. A bright windowsill is often not enough in late winter, and seedlings stretch pale and thin reaching for it. A simple LED grow light placed just above the plants for 14 to 16 hours a day keeps them compact and sturdy. If you only have a windowsill, turn the tray a quarter turn each day and choose your sunniest window. Pot seedlings on into slightly larger pots when they have a couple of sets of true leaves and roots are filling the first pot. Handle them by a leaf or by the root ball, not by the delicate stem, which crushes easily.
Transplanting Into the Final Pot
Wait until the weather has genuinely settled before peppers go outside for good. This crop has no frost tolerance, and it also sulks in cold conditions well above freezing. Transplant after all danger of frost has passed and night temperatures are staying reliably above about 10°C, ideally warmer. In zones 8 to 10 that is often mid spring. In zones 5 to 7 it is commonly late spring, and an unseasonably cold week after planting does more harm than a patient extra week indoors. Gardeners in zones 3 and 4 should plan on late spring to early summer transplanting into the warmest, most sheltered spot available, and favour early varieties.
Harden plants off before they move out permanently. Over seven to ten days, put them outside for a few hours in a sheltered, bright spot, then bring them in, gradually increasing the time and sun exposure. A seedling moved straight from a kitchen windowsill into a full day of hot sun and wind can scorch and wilt badly, even though peppers love sun as established plants. Hardening off is boring and it works.
Plant the seedling at the same depth it was growing in its pot. Unlike tomatoes, peppers do not need to be buried deeply, and burying the stem well above the original level is not helpful. Firm the mix gently around the root ball, water in thoroughly to settle it, and add a light mulch once the plant is growing. If a cold night is forecast in the first week or two, cover the pot in the evening with a cloche or fleece, or simply carry smaller pots under cover for the night. That flexibility is one of the quiet pleasures of growing in containers. Stake soon after planting rather than later, for reasons covered below, so the support is in place before the roots spread through the pot.
Sun and Warmth: Giving Peppers the Light They Crave
Peppers are sun lovers in a way that some vegetables only pretend to be. Aim for 6 to 8 or more hours of direct sun a day. More is usually better, provided you keep up with watering. A plant in too little sun grows soft and leggy, flowers poorly, sets little fruit, and is more prone to pests. On a balcony, the sunniest end is where the pepper pot belongs. Leafy crops can take the shadier end. Do not waste your best light on a plant that does not need it while the pepper sits in shade.
Warmth matters alongside light. Peppers grow best when days are warm and nights are mild. Prolonged cold nights early in the season cause blossom drop and slow, stunted growth that the plant takes weeks to shake off. A pot against a sunny wall or fence is an excellent position, because the wall stores heat during the day and gives some of it back at night, and the plant is sheltered from battering wind. Leave a little space for air to circulate around the foliage, though. Crowded, still, damp air encourages disease, so sheltered should not mean stuffed into a corner with no airflow.
In very hot climates, and during genuine heatwaves elsewhere, the challenge flips. Pots heat up quickly, roots get stressed, and blossom can drop when temperatures are extreme even though the plant looks otherwise healthy. Light afternoon shade for the pot, a mulch on the surface, and extra water will usually carry a plant through a hot spell, and fruit set resumes when nights cool slightly. In cool climates, do the opposite: use the heat of a wall, choose a dark pot that warms up, and move the pot to chase the sun as the season turns in autumn.
Watering and Feeding Peppers in Containers
Container peppers depend on you completely for water, and even moisture is the goal. The mix should stay evenly moist, never bone dry for days and never permanently waterlogged. In warm weather, a pepper in a 5-gallon pot in full sun will usually need water every day, and in a heatwave or in a smaller pot or fabric bag, twice a day is not unusual. Do not water by the calendar alone. Push a finger a few centimetres into the mix. If it feels dry at that depth, water. If it is still moist, wait and check again. The surface dries out long before the root zone, so judging by looks alone misleads a lot of gardeners.
Water deeply at the base of the plant until a little runs from the drainage holes, so the whole root ball is wetted rather than just the top layer. Morning is the best time. The plant starts the day charged with moisture, and any splashes on the leaves dry quickly in the sun, which reduces disease risk. Try to keep water off the foliage as a habit. A mulch of straw, shredded leaves, or compost spread over the surface of the pot slows evaporation, keeps the root zone cooler, and stops mix splashing onto lower leaves. Uneven watering is also linked to blossom end rot on the fruit, a dark, sunken patch at the tip. It is most often a watering problem rather than a simple lack of calcium in the mix, because dry-and-flood cycles stop the plant moving calcium to the fruit properly. Steady watering prevents most cases.
Feeding matters because a pot holds only a limited amount of food, and regular watering washes nutrients through it over time. The slow-release fertiliser added at planting covers the early weeks. Once the plant is flowering and fruiting, give a liquid feed once a week at the rate on the label. A balanced liquid feed works, and many gardeners switch to a tomato feed once fruit sets, because its higher potash supports fruiting. Be careful with high-nitrogen feeds during fruiting. They push soft, leafy growth at the expense of flowers, and you end up with a beautiful bush and very few peppers. Feed onto moist mix, not dry mix. If the plant looks pale overall and growth slows despite regular watering, it is usually hungry, and a consistent weekly feed will show results within a couple of weeks. Yellowing of just the oldest lower leaves, by contrast, is often natural ageing. Look at the whole plant before you react.
Peppers sit happily alongside other pot crops once you understand their needs, and comparing them with similar warm-season plants helps you plan feeding and space. Our roundup of the best vegetables to grow in pots is handy if you are deciding which other containers deserve your sunniest spots next to the peppers.
Staking and Looking After the Growing Plant
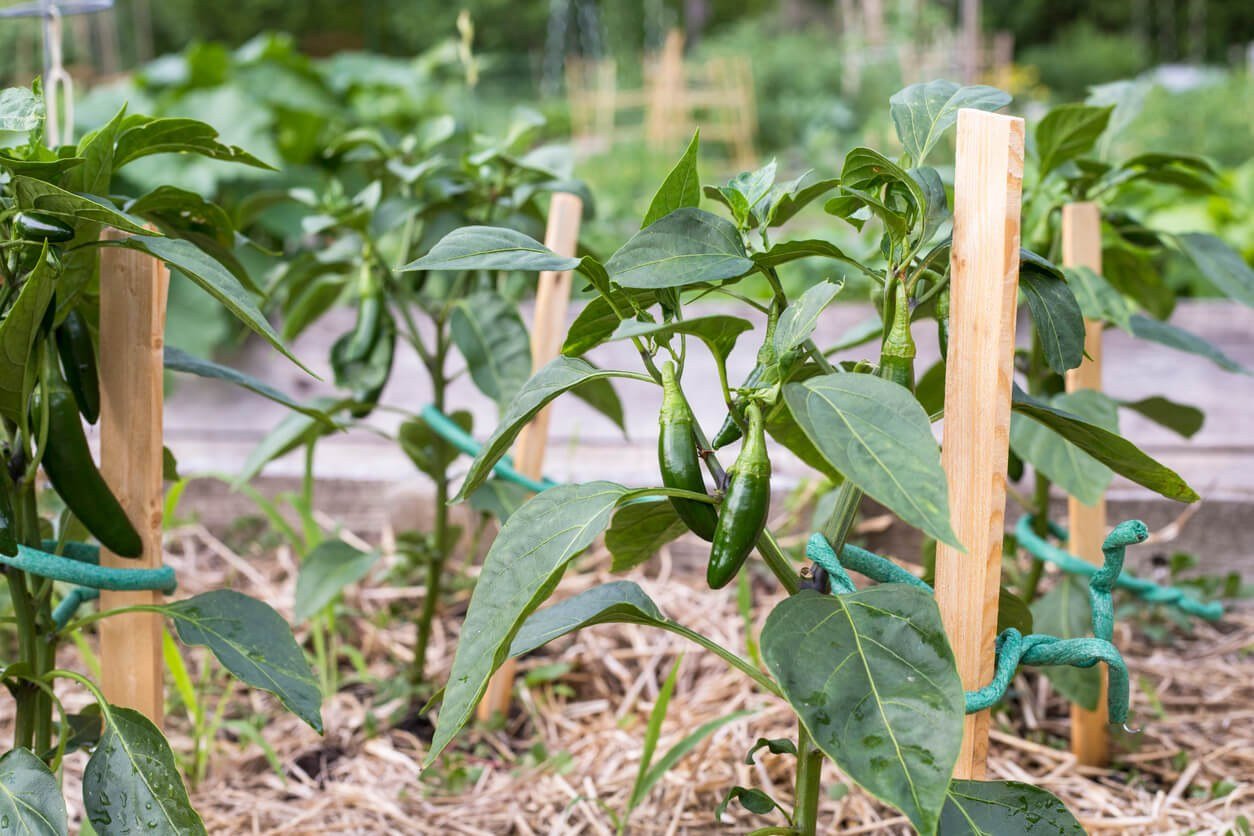
Pepper plants have brittle stems. That surprises people the first time a branch loaded with fruit snaps in a gust of wind or under its own weight during watering. Support is cheap insurance. Push a sturdy cane or a small stake into the pot at planting time, while the roots are still small and you cannot damage them, and tie the main stem to it loosely as the plant grows. Use soft ties in a figure of eight so the stem is held without being cut into. Taller varieties and bell peppers carrying heavy fruit benefit most. Compact patio chillies in a sheltered spot may need only a short cane, or none at all, but even they appreciate support on a windy balcony.
Tie in new growth every few weeks rather than forcing stems into place later, when they are stiff and snap easily. If a branch does break partway, it sometimes keeps growing if the break is partial, but a cleanly detached branch is done. Harvest any nearly ready fruit from it and move on. Pinching is optional. Some gardeners pinch the growing tip of a young plant to encourage bushier growth, and on compact varieties this can give a well-branched plant. On short-season plants it can also delay fruiting, so in zones 5 and 6 it is often better to let the plant grow naturally and spend its energy on early fruit.
Keep an eye out for aphids, which love the soft new growth of peppers, especially on plants grown under cover or stressed by erratic watering. A firm jet of water knocks most of them off, and encouraging ladybirds and other predators helps outdoors. Check the undersides of leaves when you water. Catching a small cluster early is a two-minute job. Caught late, it is a sticky mess. Remove yellowing lower leaves cleanly to improve airflow, and keep the surface of the mix free of fallen leaves and fruit, which shelter slugs and encourage rot.
Harvesting Peppers, and a Note on Overwintering
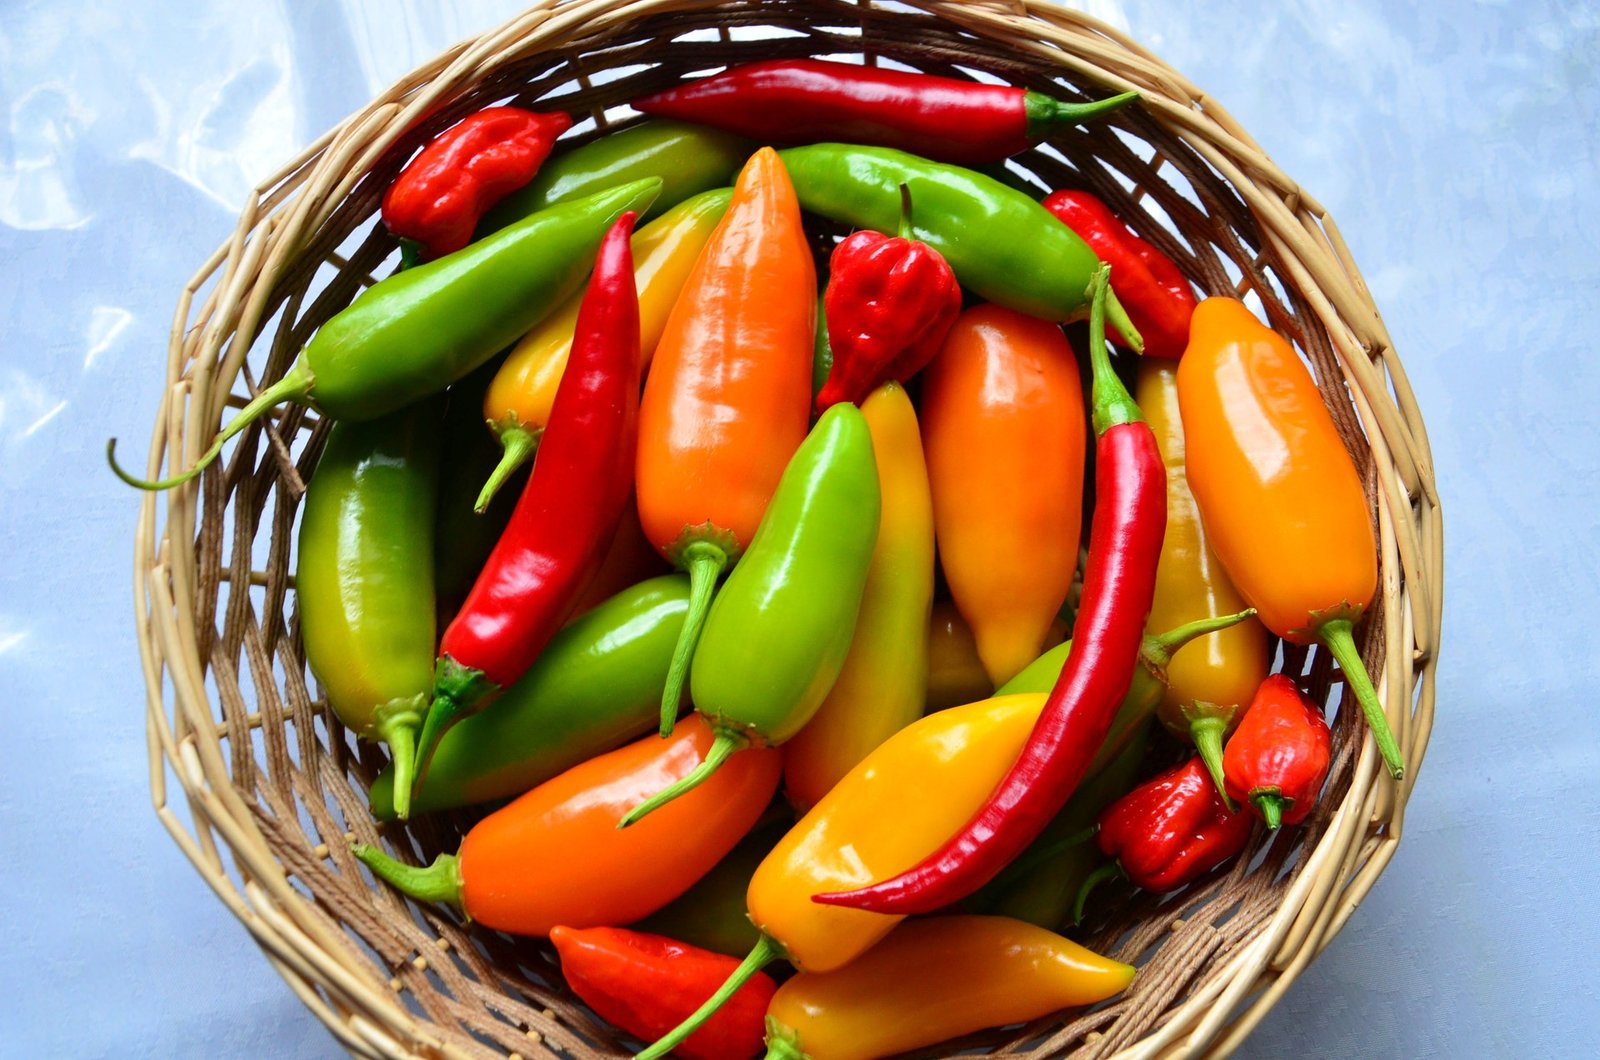
You can harvest peppers at more than one stage, and that flexibility is part of their charm. Most peppers are fully usable while still green and unripe, as long as they have reached a good size and the walls feel firm. Left on the plant, they ripen to their final colour — red, orange, yellow, or in some varieties purple or chocolate brown — and get noticeably sweeter in the case of sweet peppers, while hot peppers usually gain heat and depth of flavour as they ripen. The trade-off is time. Ripening fruit stays on the plant for weeks, and while large fruit is ripening, the plant sets less new fruit. Picking some peppers green keeps production moving. Letting others ripen gives you the full flavour. Most home gardeners end up doing a mix of both, and that is usually the right answer.
Cut fruit off with scissors, secateurs, or a sharp knife rather than pulling or twisting it off. Pepper stems tear easily, and a hard yank can rip a whole branch. Leave a short stub of stem on each fruit. Check plants every two or three days in warm weather, because fruit sizes up quickly and regular picking encourages the plant to keep flowering. Smaller hot peppers such as chillies can be picked a few at a time over a long period, and excess chillies dry well on a thread or freeze whole with no preparation at all, which solves the late-season glut neatly.
A note on overwintering, for gardeners who grow attached to a particularly good plant. Peppers are tender perennials. In frost-free climates they can live for several years, and elsewhere a plant brought indoors before the first frost can survive winter and fruit again the following year, often earlier than a new seedling. To try it, choose a healthy, pest-free plant, prune it back moderately, check it thoroughly for aphids, and keep it in a bright, cool but frost-free spot indoors, watering sparingly so the mix is barely moist. Growth will slow or pause. In spring, pot it on into fresh mix, increase water and light, harden it off, and it should leaf out again. Not every plant makes it, and you must be strict about not bringing aphid colonies indoors to your other houseplants. But when it works, a second-year chilli in particular can be impressively productive.
Practical Tips for Bigger Harvests From Pots
Put your effort into the pot and the position first. A pepper in a 7-gallon pot of good mix, in your sunniest sheltered spot, with ordinary weekly care, will outproduce a pepper fussed over daily in a small pot in half shade. Most of the result is decided before the plant flowers.
Warm the plant, not just the air. In cool springs, a pot set on paving or against a sun-warmed wall keeps roots happier than a pot on cold grass. Black or dark pots in a cool climate are an advantage for the same reason. In a hot climate, reverse the thinking and shade the pot during heatwaves.
Group pots together in hot weather. A cluster of containers shades each other’s sides a little and creates a slightly more humid pocket of air, and plants in a group often cope better with a hot afternoon than a single isolated pot baking on bare paving. Just leave enough gaps for air to move and for you to water comfortably.
Keep a simple weekly rhythm: a feed on the same day each week, a proper check for aphids and ripe fruit when you water, and a harvest round every few days. Peppers respond well to routine, and most container problems build up quietly during the busy weeks when nobody looked closely. A two-minute look while the watering can fills prevents most of them.
Sow a few extra seeds. Pepper germination is uneven even in good conditions, and having spare seedlings means you plant out your strongest plants and can replace a weak one without losing the season. Spare healthy plants also make excellent gifts, because everyone has room for one chilli pot.
If blossom drops and no fruit sets during a heatwave, do not panic and do not throw feed at the problem. Keep watering steadily, shade the pot in the worst heat, and wait. Fruit set usually resumes as soon as nights moderate, and a healthy plant has plenty of season left to catch up in most zones.
Common Mistakes and Problems to Avoid
The most common mistake is a pot that is too small. A pepper in a 1- or 2-gallon pot dries out by midday, lives under constant stress, drops its blossoms, and produces a handful of small fruit. The fix costs one bigger pot at the start of the season. Five gallons is the working minimum, and bigger is better for bells.
Starting too late, and planting out too early, are twin errors with this crop. Seed sown late in spring gives plants that only get going as the season ends. Seedlings planted out into cold nights stall, yellow, and can take longer to recover than plants kept indoors a fortnight longer would have taken to catch up. Respect the 8 to 10 week indoor start, and respect mild nights even more. Warmth is not a preference for peppers. It is a requirement.
Overwatering and underwatering both cause trouble, and beginners often swing between the two. Soggy mix rots roots and the plant wilts, which looks exactly like thirst and tempts you to water more. Check the mix with a finger before you water, every time, until the rhythm of your pots in your weather becomes familiar. Wilting at midday in strong sun, with moist mix, is often just heat stress and the plant recovers by evening. Wilting with dry mix is thirst. Learn to tell them apart before you act.
Blossom end rot, blossom drop, and sunscald are the three fruit problems you are most likely to meet. Blossom end rot is the dark sunken patch described earlier, tied to uneven watering. Blossom drop happens in cold nights early in the season and in extreme heat later, and steady conditions are the cure in both cases. Sunscald shows as pale, papery patches on fruit exposed suddenly to fierce sun, often after heavy pruning or when a plant is moved. Keep good leaf cover over developing fruit and harden moved plants gradually.
Finally, do not crowd peppers or tuck them behind taller crops. A shaded pepper is a slow, unproductive pepper, and no amount of feeding compensates for missing sun. Give the plant the best light you have, a pot it can actually grow in, and steady water, and most of the classic problems never appear at all.
Frequently Asked Questions
How many gallons does a pepper plant need in a pot?
Allow 3 to 5 gallons per plant as an absolute minimum range, with 5 gallons being the practical choice for most varieties. Compact chillies can manage in 3 gallons with careful watering. Bell peppers do better in 5 to 7 gallons, and up to 10 gallons gives the steadiest moisture and the best fruit. One plant per pot is the safest arrangement.
Can I use garden soil in a container for peppers?
No, it is a poor choice even if your garden soil is good. In a pot, garden soil compacts, drains badly, and can carry disease and weed seeds. Use a bagged potting mix instead, optionally blended with a little compost and perlite. Peppers need roots that can access water and air at the same time, and potting mix is made to provide exactly that.
Why is my potted pepper dropping its flowers?
Blossom drop is usually caused by temperature stress or uneven watering. Cold nights early in the season are the most common trigger, followed by extreme heat later on. A very dry pot followed by soaking also stresses the plant. Keep nights mild before planting out, water evenly, and wait for conditions to settle. Healthy plants normally start setting fruit again once temperatures moderate.
How often should I water peppers in containers?
In warm weather, expect to water daily for a plant in a 5-gallon pot in full sun, and possibly twice a day in a heatwave, in a smaller pot, or in a fabric grow bag. Always check first by pushing a finger into the mix. If it is dry a few centimetres down, water deeply at the base. If it is still moist, wait and check again later.
Do pepper plants in pots need support?
Most do, yes. Pepper stems are brittle and branches carrying heavy fruit can snap in wind or under their own weight. Push a cane into the pot at planting time and tie the main stem in loosely as it grows. Compact patio varieties in sheltered spots need the least support, while tall varieties and bell peppers with heavy fruit need it most.
Can I keep a pepper plant over winter?
Yes, sometimes. Peppers are tender perennials, so a healthy plant brought indoors before frost, pruned back lightly, checked carefully for aphids, and kept bright and frost-free with sparing watering can survive and fruit again next year. Success is not guaranteed, and seed starting is more reliable, but overwintered chillies in particular can be very productive in their second season.
Final Thoughts
Peppers and pots suit each other. The plant gets the warm, well-drained, sheltered conditions it always wanted, and you get a long, colourful harvest from a remarkably small footprint. None of the steps are difficult once they are in the right order: choose a variety that fits your space and season, give it a genuinely large pot of proper potting mix, start seed early and warm indoors, and then keep the sun, water, and weekly feed steady through summer.
If your first season is modest, look honestly at pot size, planting date, and watering before blaming the variety. Those three explain most disappointing pepper pots, and all three are easy to fix next year. Start with one jalapeño and one sweet pepper in your sunniest spot this season, pick some fruit green and let some ripen fully, and you will have learned more by autumn than any guide, including this one, can teach you by reading alone.