

Best soil for vegetable gardening is not something you buy in a single bag or dig up by luck. It is something you recognise, and then build, over time. If you have ever pulled sweet carrots from one bed and stunted, forked ones from another in the same garden, you have already seen how much difference soil makes. Vegetables are demanding tenants. They grow fast, they fruit heavily, and most of them complete their whole life in a single season, so they need soil that can supply water, air, and food steadily, week after week, without waterlogging in a wet spell or baking dry in a warm one.
The reassuring part is that good vegetable soil is not a mystery formula. It has a knowable structure, a roughly right acidity, and plenty of organic matter, and almost any soil you start with — heavy clay, thin sand, tired builder’s rubble soil on a new plot — can be moved towards it with the right additions in the right order. You do not need to achieve perfection before you plant. Gardeners improve soil a little each season, and vegetables respond quickly to even the first improvements.
This guide explains what good vegetable soil actually is in plain language: what loam means, how sand, silt, and clay behave, how to balance drainage against moisture holding, what pH range most vegetables prefer and why it matters, how to test your soil without guessing, and how to fix clay and sandy soils, mix soil for raised beds, and choose bagged soil sensibly when you need it. There is also a short note on no-dig gardening, because how you treat the surface changes the soil underneath more than many people realise.
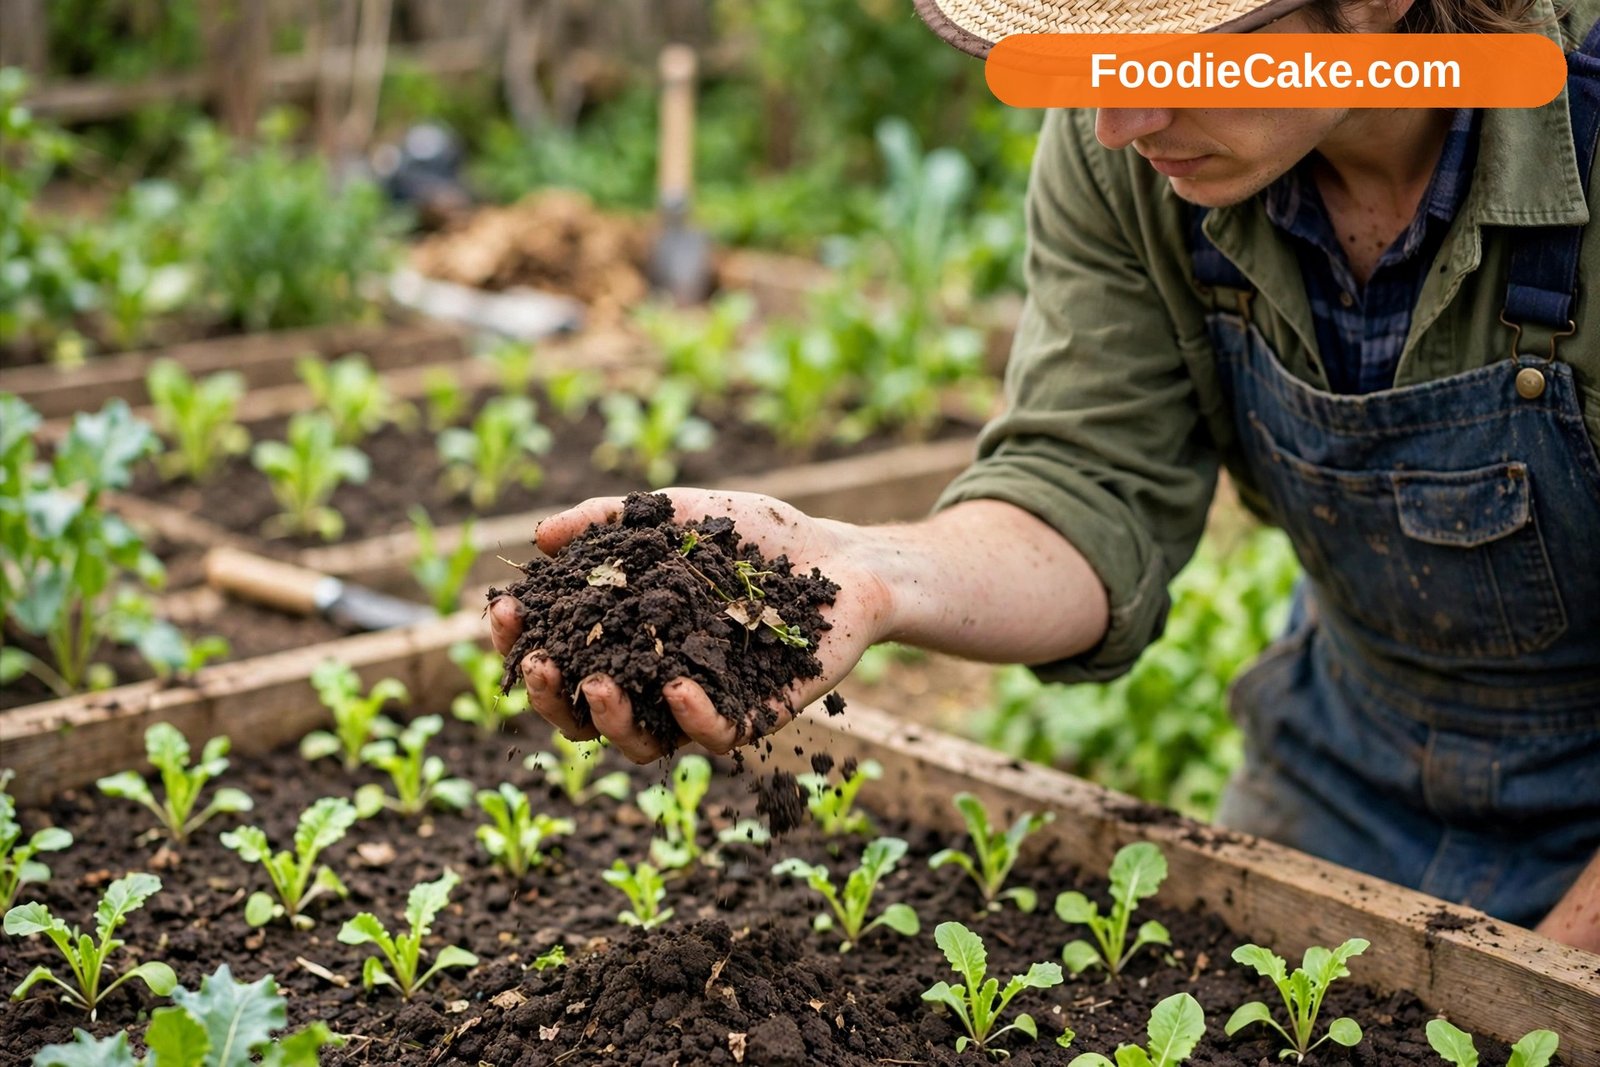
What Good Vegetable Soil Actually Is
Good vegetable soil does four jobs at once. It holds enough moisture for roots to drink between waterings or rain showers. It drains the excess away, so roots are not sitting in water and can still access air. It supplies nutrients in a form plants can use, and holds on to them rather than letting them wash straight through. And it gives roots a structure they can push through easily, without fighting a solid pan or drifting loosely in pure sand. Soil that does all four is what gardeners mean when they call a soil fertile, and texture, organic matter, and pH are the three levers that decide whether yours does them well.
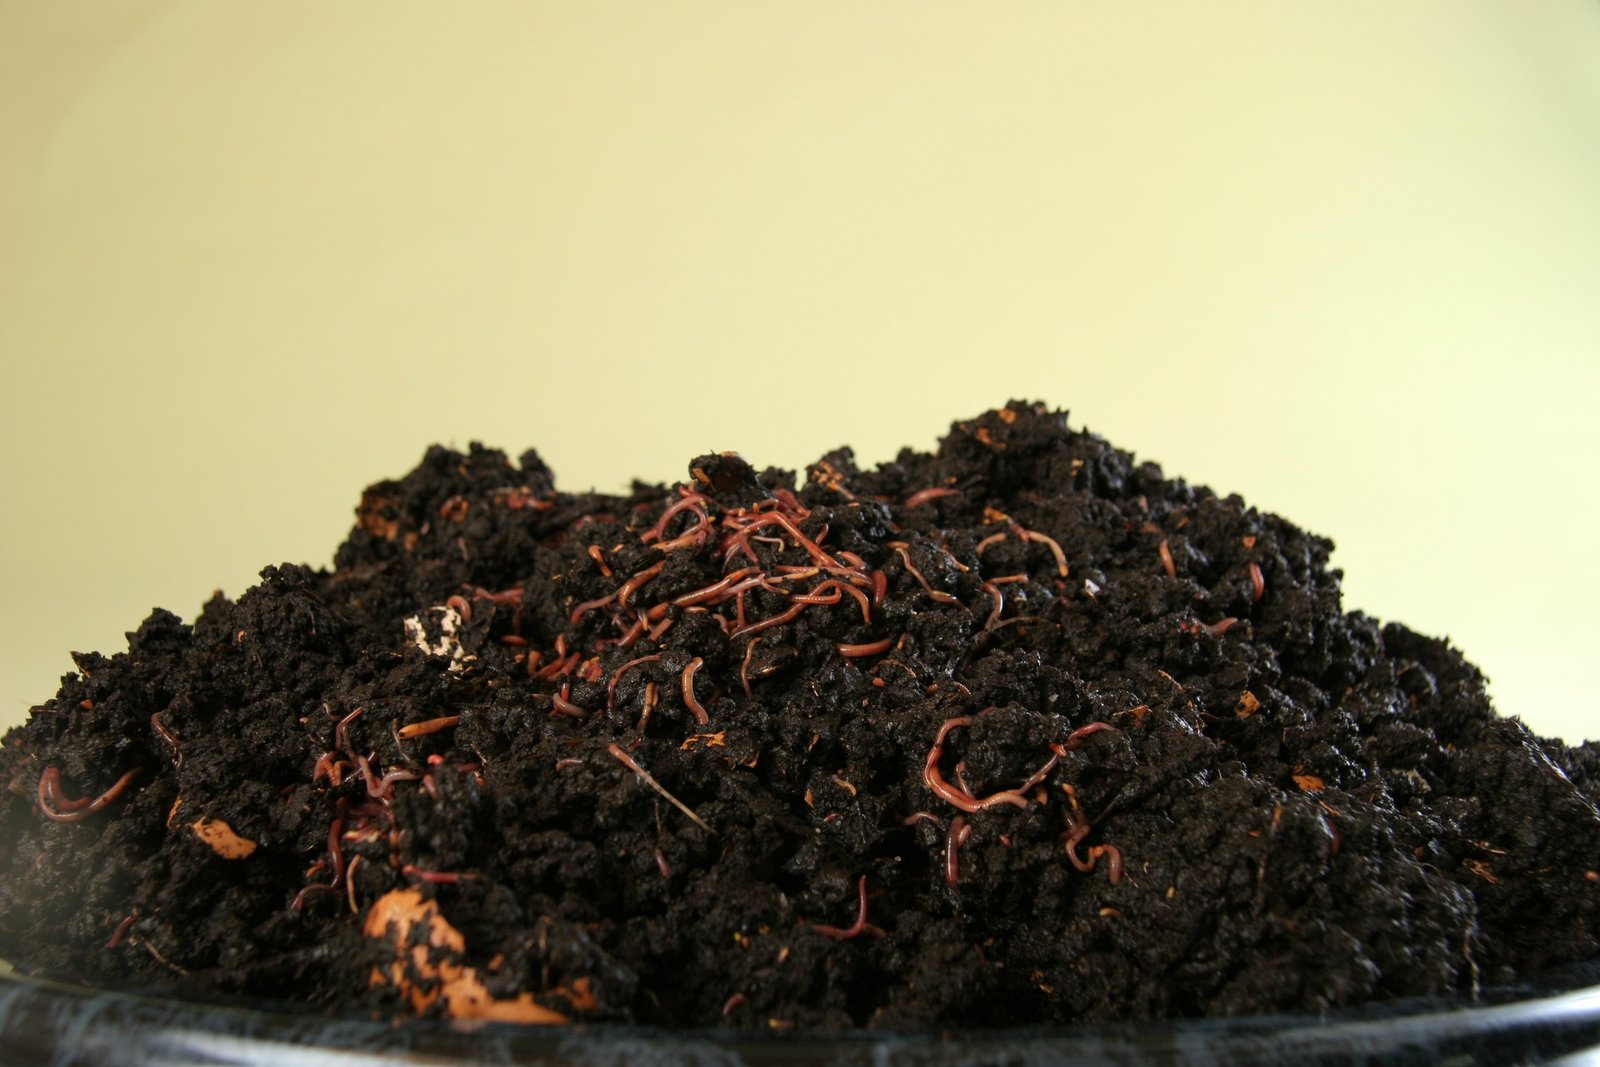
The ideal most vegetable gardeners aim for is called loam. Loam is not a single ingredient. It is a balanced blend of the three mineral particles that make up almost all soils: sand, silt, and clay. A good loam is often described as roughly 40 percent sand, 40 percent silt, and 20 percent clay, with a healthy helping of organic matter mixed in. You do not need to memorise those numbers. What matters is what the balance feels like in your hand. Loam is crumbly, dark, and easy to dig. It forms a loose ball when you squeeze a moist handful, then breaks apart easily when you poke it. It smells earthy rather than sour. Carrots push straight down through it, worms move through it happily, and water soaks in instead of pooling on top or vanishing instantly.
Very few gardens start with perfect loam, and that is normal. Most start clay-heavy, sand-heavy, or silt-heavy, and the job of soil improvement is to nudge what you have towards that crumbly middle ground, mostly by adding organic matter and, for some soils, mineral amendments. Understanding which way your soil leans is the first step, because the fix for clay is almost the opposite of the fix for sand, and adding the wrong thing wastes a season.
Sand, Silt, and Clay: The Texture Triangle in Plain Words
Soil scientists plot soil texture on a triangle with sand, silt, and clay at the corners, and every soil sits somewhere inside it depending on its proportions. You do not need the diagram to garden well, but the three particles themselves are worth understanding, because each behaves very differently in a vegetable bed.
Sand is the largest particle. You can see individual grains, and a sandy soil feels gritty between your fingers. Water drains through sand quickly, air moves through it easily, and it warms up fast in spring, which is why sandy gardens can sow early. The downsides are the mirror image of those strengths. Sandy soil dries out quickly, and nutrients wash through it before roots can take them up. Plants in sand are often thirsty and hungry at the same time. Pure sand grows very little well, apart from a few specialist crops, and carrots in sandy soil may be straight but small without regular feeding and watering.
Clay is the smallest particle, so small you cannot see individual grains. A clay soil feels smooth and sticky when wet and sets hard, with cracks, when dry. Clay holds water and nutrients far better than sand, which is why clay soils are often naturally fertile. The problems are drainage and workability. Water sits on clay after rain, roots struggle for air, the soil is cold and slow to warm in spring, and digging it at the wrong moment — wet enough to stick to your boots — damages its structure for months. Root vegetables suffer most visibly. Carrots and parsnips fork, split, or give up in heavy, stony clay.
Silt sits between the two in particle size. It feels smooth and almost soapy or floury when rubbed between your fingers. Silty soils hold moisture well and are often fertile, especially the deep silts of old river valleys, but they can compact at the surface and form a crust that seedlings struggle to break through, and they can slump into a dense layer if worked too much.
You can get a useful read on your own soil with two simple tests. For the squeeze test, take a handful of moist soil, squeeze it into a ball, then open your hand. Sand falls apart immediately. Good loam holds a loose ball that crumbles when poked. Clay holds a firm, sticky ball that you can roll into a sausage shape, and the longer and thinner the sausage you can roll without it breaking, the heavier the clay. For the jar test, shake a sample of soil in a jar of water, let it settle for a day, and look at the layers: sand settles at the bottom first, silt in the middle, and clay stays cloudy longest before settling on top. Neither test is laboratory science, but together they tell you honestly which way your soil leans, and that is enough to choose the right improvements.
Drainage Versus Moisture Retention: Finding the Balance
New gardeners often treat drainage and moisture retention as opposites, as if soil must be one or the other. Good vegetable soil is both at once, and understanding how is the key to most soil advice. The trick is pore size. A healthy loam contains a mix of large pores, which empty quickly after rain and refill with air, and small pores, which hold water against gravity and release it slowly to roots. Organic matter is what creates and maintains that mix of pore sizes in most garden soils, which is why it appears in almost every recommendation in this article.
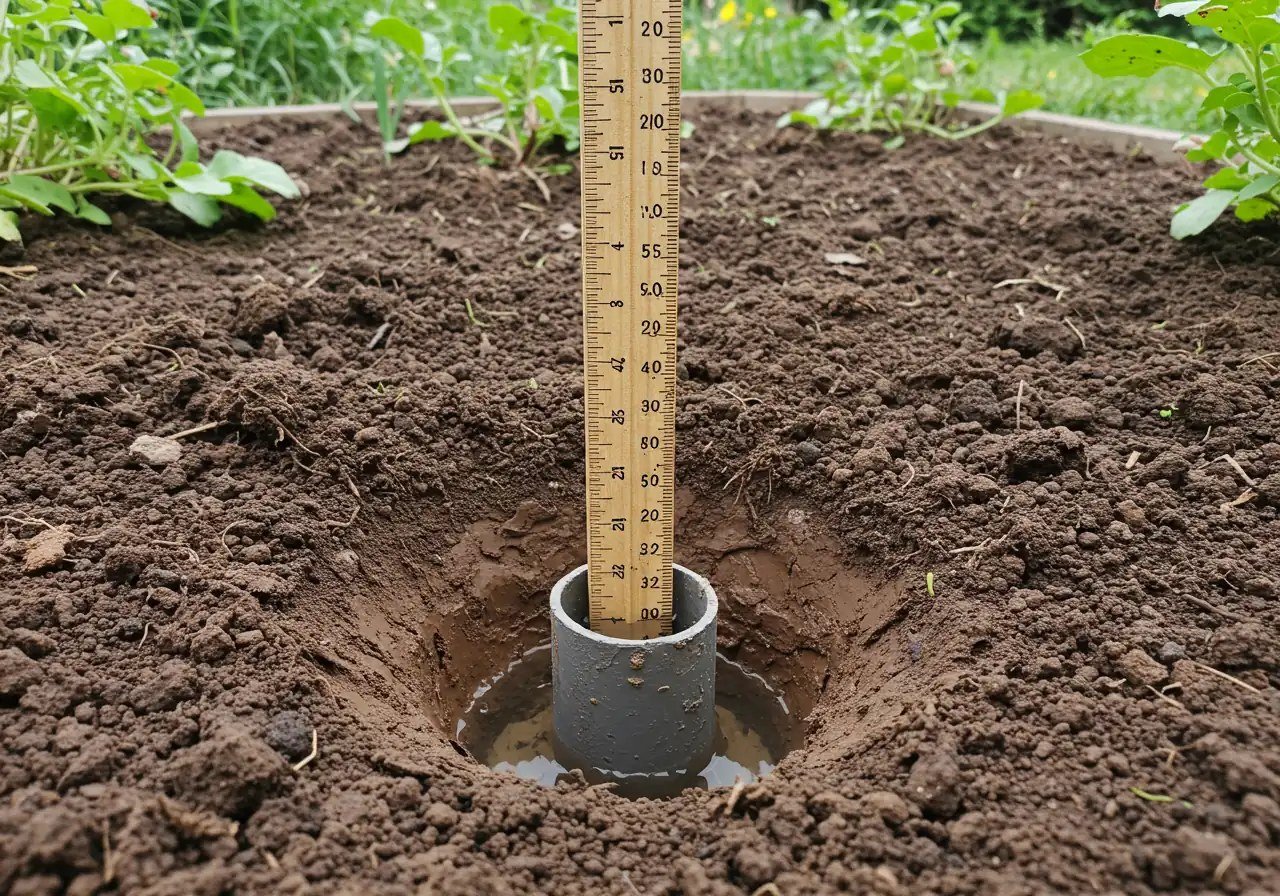
You can test your drainage simply. Dig a hole about 30 cm deep, fill it with water, let it drain, then fill it again and time how long the second filling takes to disappear. Very fast drainage, where the water is gone almost immediately, points to a sandy, thirsty soil that will need organic matter and regular watering. Very slow drainage, where water still sits after many hours, points to heavy clay, compaction, or a high water table, and a vegetable bed there will need structure work, raised beds, or both. A steady middle drain is what you want, and most loams sit in that middle band. Do the test when the soil is at a normal moisture level, not after a drought or a storm, or the result will mislead you.
Compaction is the hidden drainage problem on many plots. A dense layer, often just below spade depth from years of digging to the same level, or at the surface on paths and new-build gardens where machinery has run, stops water and roots alike. Vegetables in compacted soil grow as if the bed were drought-prone and waterlogged by turns, because in a sense it is: water cannot get down, and roots cannot get down either. Breaking up a compacted layer once, then keeping organic matter coming and avoiding walking on beds, does more for some gardens than any fertiliser ever will.
Mulching links into this balance too. A layer of compost, straw, or shredded leaves on the surface slows evaporation, softens the impact of heavy rain that would otherwise seal the surface, keeps soil temperature steadier, and feeds the worms that keep pores open as they move through the soil. In practice, moisture problems blamed on soil type are often partly mulching and watering problems, and all three improve together.
pH: Why Around 6.0 to 7.0 Suits Most Vegetables
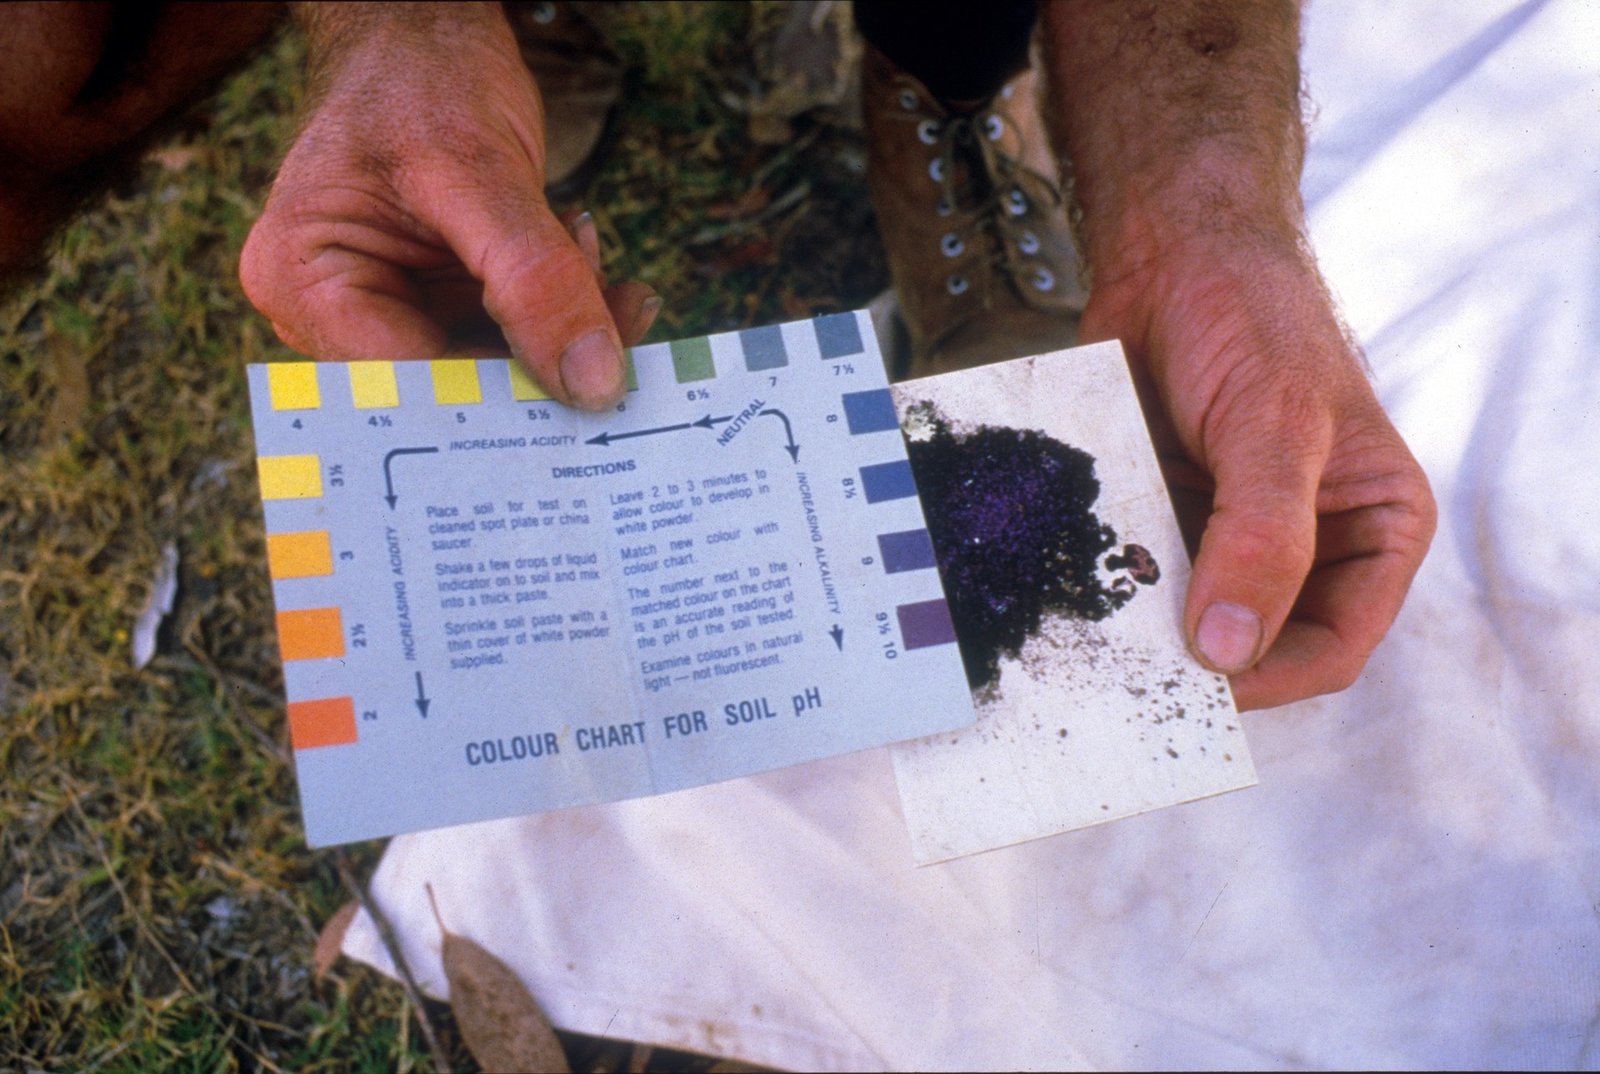
Soil pH measures how acidic or alkaline your soil is, on a scale where 7.0 is neutral, lower numbers are acidic, and higher numbers are alkaline. Most vegetables grow best in soil that is slightly acidic to neutral, roughly pH 6.0 to 7.0, with many common crops happiest around 6.2 to 6.8. There are exceptions at the edges, but if you only remember one range, remember that one. It is the zone where the widest range of nutrients stays available to plants.
The reason pH matters is nutrient availability, not acidity itself burning the plant. In strongly acidic soil, key nutrients such as phosphorus become locked up in forms roots cannot take up well, and elements such as aluminium can become more available at levels that stunt roots. In strongly alkaline soil, iron, manganese, and phosphorus become less available, and the classic symptom is yellowing between the veins of young leaves on a plant that has been fed and watered correctly. In both cases the nutrients can be present in the soil and the plant still goes hungry, which is why throwing more fertiliser at a pH problem rarely fixes it. Adjusting pH towards the middle unlocks food that is already there.
Some vegetables have preferences worth knowing. Potatoes prefer slightly more acidic soil, around 5.5 to 6.5, and growing them in more acidic conditions also discourages common scab. Brassicas such as cabbage, kale, and Brussels sprouts prefer the upper part of the range, around 6.5 to 7.5, and clubroot disease is less severe in less acidic soil, which is why liming brassica beds is a long-standing practice. Most other vegetables — tomatoes, beans, peas, courgettes, lettuce, carrots, onions — sit comfortably in the general 6.0 to 7.0 band, so a mixed vegetable garden does not need different pH in every bed. Aim for the middle, and adjust individual beds only if a specific crop keeps struggling.
Changing pH is slow, and that is a feature, not a fault. To raise pH and make acidic soil less acidic, garden lime is the standard amendment, applied at the rate on the product and best worked in during autumn so it has time to act before spring planting. To lower pH, elemental sulfur is used, and soil organisms convert it gradually over months. Small, measured changes based on a test beat large guesses in both directions. Overshooting with lime is a common and annoying error, because bringing pH back down is slower and harder than raising it carefully in the first place.
Organic Matter: The One Improvement Almost Every Soil Needs
If there is a single amendment that helps clay, sand, and silt alike, it is organic matter: compost, well-rotted manure, leaf mould, and other decayed plant and animal material worked into or laid onto the soil. In clay, organic matter helps the tiny particles clump into crumbs with air spaces between them, so drainage and root growth improve. In sand, it acts like a sponge in the gaps between grains, holding water and nutrients that would otherwise wash straight through. In any soil, it feeds the bacteria, fungi, and worms whose activity creates and maintains good structure in the first place. Soil is not just a substance. It is a living system, and organic matter is its food.
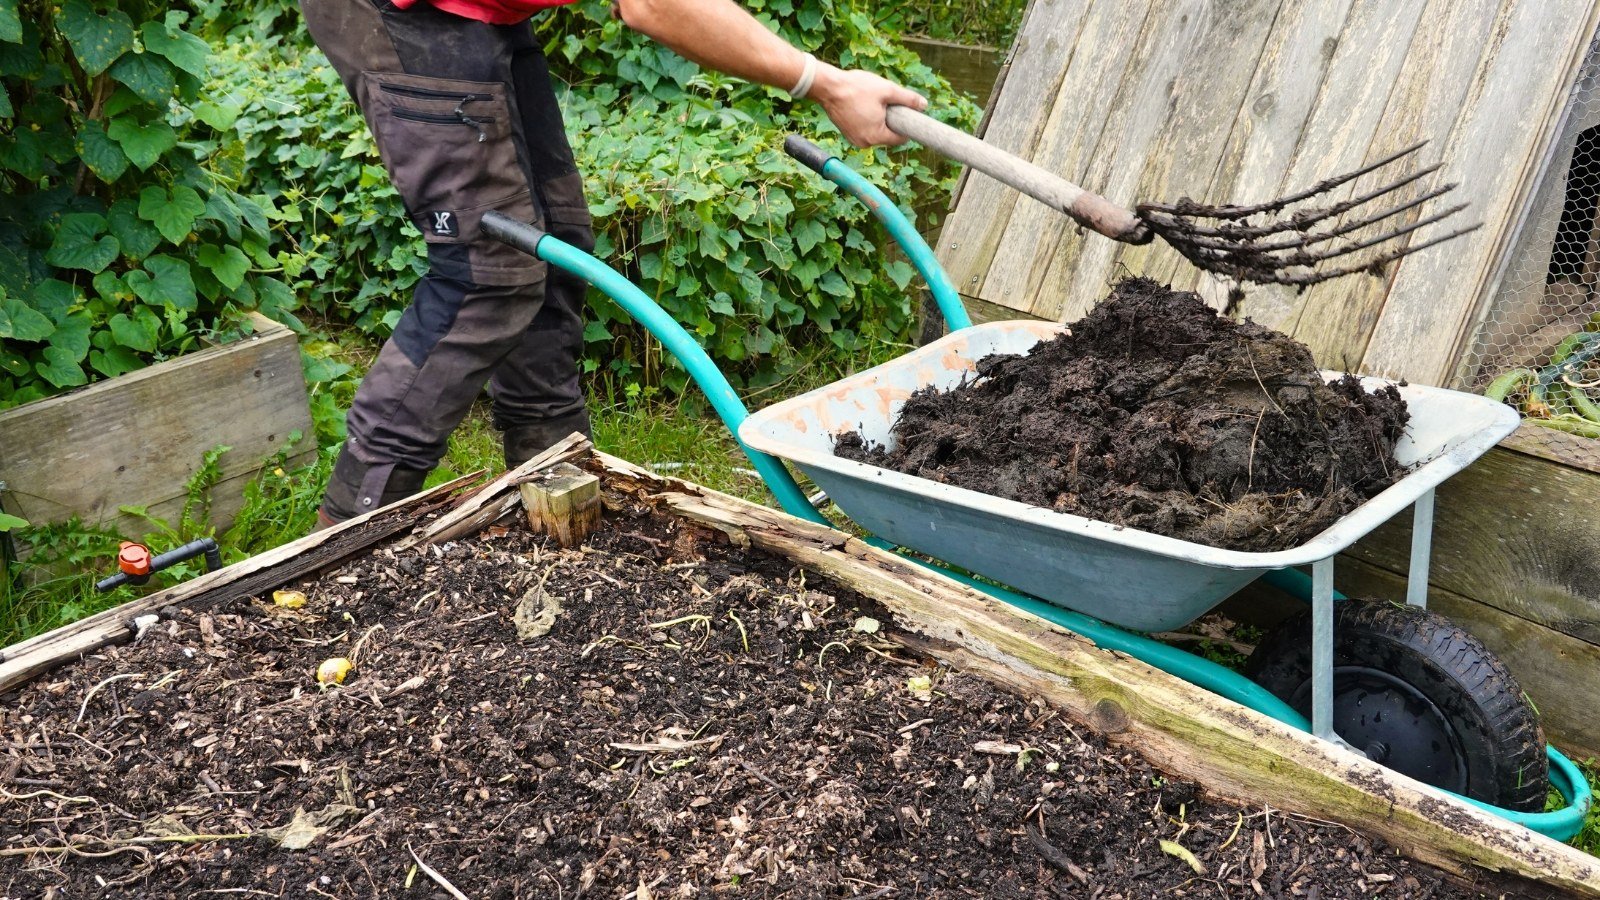
Aim to add organic matter regularly rather than in one heroic dose. A layer of compost a few centimetres deep, spread over beds once a year, is the habit that transforms gardens over two or three seasons. Many experienced vegetable growers use homemade compost as the backbone of that routine, and learning how to make compost at home gives you a free, steady supply made from your own kitchen and garden waste. Well-rotted farmyard manure is excellent too, provided it is genuinely well rotted. Fresh manure can scorch plants, carry weed seeds, and, in rare cases, contain persistent weedkiller residues from treated hay, so buy from a source you trust and test a small batch on a few bean seedlings first if you are unsure. Leaf mould — leaves rotted down for a year or two — is a superb soil conditioner, especially for opening up heavy soil, though it adds fewer nutrients than compost or manure.
Organic matter is used up over time as soil life consumes it, which is why the annual top-up matters more than any single application. Warm climates and light soils burn through it fastest. Think of it as feeding the soil the way you feed the plants: little and often beats a feast followed by a famine. Cover crops, also called green manures, are another way to add it. Fast-growing plants sown on empty beds protect the surface, their roots open the soil, and when dug in or cut and left on top they add bulk and, in the case of clover and other legumes, extra nitrogen as well.
Testing Your Soil Before You Spend Money
Testing turns soil improvement from guesswork into a short, targeted shopping list. At minimum, test pH, because it decides whether nutrients are available at all and whether lime is needed. A simple probe or a colour-change kit from a garden centre gives a rough answer in minutes and is good enough to flag a serious problem. A laboratory test, arranged through a local extension service or a mail-in service where you are, costs more but repays it on a new or struggling plot: it typically reports pH, the main nutrients, organic matter percentage, and a lime and fertiliser recommendation matched to your results. Test each distinct area separately if your garden has obviously different soils, and sample properly: take several small samples from across the bed at spade depth, mix them in a clean bucket, and send or test a portion of that mix, so one odd corner does not skew the whole result.
Retest every few years, or sooner if plants keep showing the same deficiency symptoms despite feeding. Keep the results with your garden notes and compare them over time. Watching organic matter climb and pH settle into range across three tests is one of the quiet satisfactions of vegetable gardening, and it tells you your routine is working better than any single season’s harvest can.
What a test cannot tell you is texture and structure, which is why the squeeze and jar tests described earlier still matter. A lab can tell you the food is present. Only your hands in the soil can tell you whether roots can reach it.
Amending Clay Soil and Sandy Soil
Clay soil needs structure, patience, and organic matter in quantity. Spread compost or well-rotted manure generously and work it into the top layer, or lay it on top and let worms take it down in a no-dig system, as described below. Adding coarse horticultural grit can help in small, intensive beds, but it takes a great deal of grit to change a whole clay plot, and compost usually delivers more benefit per barrowload. One warning deserves emphasis: do not try to fix clay by adding sand alone. Clay plus sand in the wrong proportions, without plenty of organic matter, can set into something closer to concrete than soil. It is an old warning because it is a mistake people keep making. Gypsum is sometimes sold for clay soils and can help certain sodic clays flocculate and drain better, but it is not a universal clay cure and does not replace organic matter. On heavy clay, also learn to time your work: dig and plant when the soil is moist but not sticky, avoid walking on beds, and consider raised beds for your earliest and most drainage-sensitive crops while the clay below improves year by year.
Sandy soil needs the opposite emphasis: hold on to what passes through. Organic matter is again the main tool, applied generously and topped up often, because sandy soil consumes it quickly. Mulching is close to essential on sand, both to slow evaporation and to add a slow trickle of organic material at the surface. Feeding needs adjusting too. Smaller, more frequent applications of fertiliser suit sandy beds better than one large dose that leaches away with the next heavy watering, and slow-release and organic feeds, which release nutrients gradually, fit sandy soil particularly well. Watering little and often, rather than rarely and heavily, matches how sand behaves. The compensation for all this attention is real: sandy soil warms early, drains beautifully after storms, and grows superb root crops once its thirst and hunger are managed.
Silty and already-decent loam soils need the lightest touch. Keep the annual compost coming, avoid unnecessary digging and compaction, and mulch. Good soil is easier to damage than bad soil is to fix, and heavy machinery, wet-weather digging, and leaving beds bare all winter are the usual ways decent soil quietly gets worse.
For a broader routine you can follow season by season alongside the fixes in this section, see our guide on how to improve garden soil naturally, which covers cover crops, mulches, and compost in day-to-day practice.
Soil for Raised Beds: Mixes That Work
Raised beds solve several problems at once: drainage on clay, depth on thin or rubble-filled soil, and defined beds you never walk on, so compaction largely disappears. But a raised bed is only as good as what you fill it with, and filling a large bed with bag after bag of a single product, chosen at random, is an expensive way to get mediocre soil.
A widely used approach is to blend topsoil, compost, and an aerating component rather than relying on one material. A common working ratio is around 60 percent good-quality topsoil, 30 percent compost or well-rotted manure, and 10 percent material that keeps the mix open, such as perlite, coarse composted bark, or similar. Variations on that theme fill most successful beds. Pure potting mix in a deep bed is usually a mistake: it is costly at that volume, it can dry and shrink, and it lacks the mineral body that long-term beds need. Pure topsoil alone often settles dense. The blend gives you structure, food, and drainage together.
Expect a new bed to settle. The mix will drop noticeably in its first season as organic matter compacts and begins to break down, so fill beds generously, mound the surface slightly at the start, and plan to top up with compost each year. That annual top-up is not a failure of the original mix. It is the maintenance that keeps raised-bed soil improving instead of slowly depleting, and after a few years of it, many growers find their raised-bed soil is the best on the plot. Deep beds, roughly 30 cm or more of filled depth, suit most vegetables. Very shallow beds struggle with moisture and root room for larger crops such as sweetcorn and brassicas, whatever mix you use.
Buying Bagged Soil, Compost, and Topsoil Sensibly
Bagged products vary enormously, and the label tells you less than your hands and nose will. A good bagged compost or soil mix should smell earthy and pleasant, feel loose and crumbly rather than dense and sour, and be free of large undecomposed chunks, obvious plastic, and a strong chemical or ammonia smell. Sour, waterlogged-smelling bags have usually been stored wet and sealed, and while they often recover once opened and aired, a strongly unpleasant bag is worth rejecting at the shop if you can check.
Read what the product actually is. Multi-purpose compost is a growing medium for pots and for mixing, not a complete garden soil on its own. Screened topsoil should be described as such, with stones and debris removed, and is meant as the mineral base of a blend or for levelling, not as a rich planting medium by itself. Farmyard manure products should say well-rotted. Soil improvers and conditioners are mostly organic matter for digging or mulching into existing beds. Buying the wrong category is more common than buying a bad brand, so match the bag to the job: potting mix for containers, topsoil-plus-compost blends for filling beds, and compost or manure for improving soil you already have.
Buy the freshest-looking stock you can, stored under cover if possible, and do not stockpile bags outdoors for months where rain turns them into a wet, airless mass. If you need large volumes for raised beds, a bulk delivery of compost or blended topsoil from a reputable local supplier is usually cheaper and fresher than dozens of small bags, but inspect it on arrival for weed seeds, debris, and smell before it goes into the beds, because returning a dumped bulk load is not a realistic option.
A Short Note on No-Dig Gardening
No-dig, or no-till, gardening has moved from a fringe idea to a mainstream option for vegetables, and it is worth understanding even if you decide it is not for you. The principle is simple: instead of turning the soil over each year, you feed it from the top. You lay compost and organic matter on the surface, plant through it, and let worms and soil life pull it down and mix it for you. Undisturbed, the soil keeps its structure, its pore networks, and its fungal threads intact, and those networks are part of how nutrients and water move to roots.
In practice, a no-dig bed starts with weeds suppressed under cardboard or a thick layer of compost, then receives a few centimetres of compost on top each year. Many growers report fewer weeds over time, because weed seeds are not constantly being brought to the surface by digging, and soil that stays moist and easy to plant into. No-dig does not mean no work and it does not suit every situation at once: perennial weeds with deep roots need dealing with first, and very heavy clay improves more slowly from the top than a bed that had one initial incorporation of organic matter. But for established beds, and especially for gardeners whose backs have opinions about digging, it is a sound, well-tested approach, and it pairs naturally with raised beds and heavy mulching.
Practical Tips for Keeping Vegetable Soil in Good Shape
Feed the soil every year, not just the plants. A few centimetres of compost spread over each bed annually is the single habit most strongly linked to gardens that visibly improve season after season. If you do nothing else in this guide, do that.
Never leave beds bare over winter if you can help it. A mulch, a cover crop, or even a layer of leaves protects the surface from rain damage, slows nutrient leaching, and keeps soil life fed. Bare soil in winter rain loses more goodness than most gardeners realise.
Rotate where your crops grow. Planting the same family in the same bed year after year depletes the same nutrients and lets specific pests and diseases build up in the soil. A simple three- or four-year rotation between beds is enough for most home gardens and costs nothing but a notebook entry.
Avoid working wet soil, especially clay. Digging, and even walking on, soil that sticks to your boots destroys the crumb structure you have been building and creates compaction that takes months to undo. The old test still works: if it sticks, wait.
Water the soil, not just the plant, in dry spells. Deep, less frequent watering that wets the full root zone encourages roots to grow down into moisture, while daily light sprinkling that only wets the surface trains shallow roots that suffer at the first hot day.
Keep a simple soil diary. Note test results, what you added to each bed and when, and which crops thrived or sulked. Patterns that are invisible in one season become obvious across three, and your future self will thank you for the record.
Common Mistakes and Problems to Avoid
The most expensive mistake is adding amendments without any idea of your soil’s texture or pH. Lime spread on soil that is already alkaline, heavy fertiliser on soil that mainly lacks water, or sand dug into clay all waste money and sometimes make things worse. Squeeze a handful, and test the pH, before you buy anything in bulk. Half an hour of checking prevents most soil spending errors.
The sand-into-clay mistake deserves a second mention because it is so persistent. Sand only lightens clay when added in very large amounts together with lots of organic matter. Dug in modestly on its own, it can make heavy soil harder. Compost is the safer, cheaper correction for clay in almost every home garden.
Over-liming is the quiet pH error. Gardeners hear that vegetables like lime, apply it generously every year without testing, and gradually push pH up until iron and manganese lock up and leaves yellow mysteriously on well-fed plants. Lime to a test result, at the rate recommended, and retest before repeating. More is not better with pH amendments in either direction.
Using fresh manure is another classic problem. Fresh or partly rotted manure can scorch roots, introduce a flush of weed seeds, and carry residues you do not want near food crops. Always use manure that is well rotted — dark, crumbly, and earthy-smelling, with no recognisable straw or strong odour — and leave a sensible gap between spreading fresh material and planting, if fresh material is all you have.
Ignoring compaction wastes good soil. Beds that are walked on, worked wet, or dug to the same depth for years develop dense layers that roots and water cannot pass, and the symptoms — stunting, surface puddling, drought stress right after rain — get blamed on everything except the real cause. Keep feet on paths, vary your working depth, and fork compacted layers open once, then let organic matter and roots keep them open.
Finally, do not expect one season to finish the job. A heavy clay bed or an exhausted sandy one improves noticeably in a year and substantially in three, provided the organic matter keeps coming. Gardeners who treat soil as a long project, rather than a problem to solve before planting, end up with the best vegetable soil and the least frustration.
Frequently Asked Questions
What is the best soil mix for growing vegetables?
A balanced loam is the target: roughly equal parts sand and silt with a smaller proportion of clay, plus plenty of organic matter. In practice, most gardeners get there by adding compost or well-rotted manure to their existing soil every year. For raised beds, a blend of around 60 percent topsoil, 30 percent compost, and 10 percent open, aerating material is a reliable starting mix.
What pH should vegetable garden soil be?
Most vegetables grow best between pH 6.0 and 7.0, with many happiest around 6.2 to 6.8. In that range the widest spread of nutrients stays available to roots. Potatoes prefer it slightly more acidic, and brassicas slightly less, but a mixed vegetable garden does well aimed at the middle of the range. Test before adjusting, and change pH gradually.
How can I tell if my soil is clay, sand, or loam?
Squeeze a handful of moist soil. Sand falls apart and feels gritty. Loam holds a loose ball that crumbles when poked. Clay forms a firm, sticky ball you can roll into a thin sausage. For more detail, shake soil in a jar of water and let it settle for a day. Sand sinks first, silt settles in the middle, and clay settles last on top.
How often should I add compost to vegetable soil?
Once a year is a good rhythm for most beds: a layer a few centimetres deep, spread in autumn or spring. Sandy soil and warm climates use up organic matter faster and benefit from generous applications and mulching through the season. Raised beds also need an annual top-up because their mix settles and depletes as crops grow.
Can I grow vegetables in bagged potting mix in the ground?
It is not the best use of it. Potting mix is made for containers, where its loose, fast-draining structure suits a limited volume. In open ground or deep raised beds it is expensive, can dry and shrink, and lacks the mineral body of real soil. Use it in pots, and use topsoil blended with compost for beds.
Should I dig my vegetable beds every year?
You do not have to. Annual digging is one valid approach, especially when first improving heavy soil, but no-dig beds fed with compost on the surface also grow excellent vegetables and preserve soil structure. Either way, avoid working soil when it is wet and sticky, keep adding organic matter yearly, and never leave beds bare all winter.
Final Thoughts
Good vegetable soil is built, not found, and it is built mostly out of one material and one habit: organic matter, added every year. Once you know your texture, have a rough pH reading, and understand whether your beds need help draining or help holding water, nearly every decision that follows becomes straightforward, from choosing a raised-bed mix to knowing why a bagged product is or is not right for the job.
Start where you are. Squeeze a handful of your soil this week, test its pH, and spread compost over one bed. Vegetables are quick to respond, and a bed that gets that treatment this season will already grow better than it did last season. Keep the record, keep the annual top-up coming, and in a few years the dark, crumbly, worm-filled soil that experienced gardeners talk about will not sound like a description of someone else’s garden. It will be yours.
[…] be short on life and nutrients. If you are unsure what good vegetable soil looks like, the guide to the best soil for vegetable gardening walks through texture, drainage, and pH in more […]
[…] to warm for early sowing, then replace it once plants are growing. On a vegetable plot, knowing the best soil for vegetable gardening alongside steady mulching helps you match each bed’s treatment to what you actually grow […]
[…] organic matter feeds soil life, holds moisture, and keeps the mix open and crumbly. Understanding the best soil for vegetable gardening will help you judge bought topsoil with a critical eye, because quality varies enormously between […]