

Learning how to prune fruit trees is one of those gardening skills that looks intimidating from the outside and turns out to be surprisingly logical once someone explains what the tree is actually doing. You are not sculpting a tree into an unnatural shape for decoration. You are guiding how it grows so that light reaches the fruit, air moves through the branches, diseased or crowded wood is removed, and the harvest stays within reach instead of forming twelve feet above your head where only the birds enjoy it.
An unpruned fruit tree does not stop producing. What it usually does is produce too many small, shaded fruits on a tangle of crossing branches, with dead wood building up in the middle and disease finding damp, still corners to settle in. Pruning corrects that, a little at a time. The golden rule, especially in your first year, is that less is more. You can always take off another branch next season; you can never stick one back on. A thoughtful, moderate prune done at the right time will improve almost any tree.
This guide covers the tools you actually need, when to prune each type of fruit tree, how to make a clean cut that heals well, how to shape a young tree from the start, and how to rescue an old tree that has not been touched in years without shocking it. Timing differs by tree and by climate — in zones 5–8 dormant winter pruning suits most apples and pears, while stone fruits such as plums and cherries are usually safer pruned in summer — and those differences matter, so they are explained in full rather than glossed over.
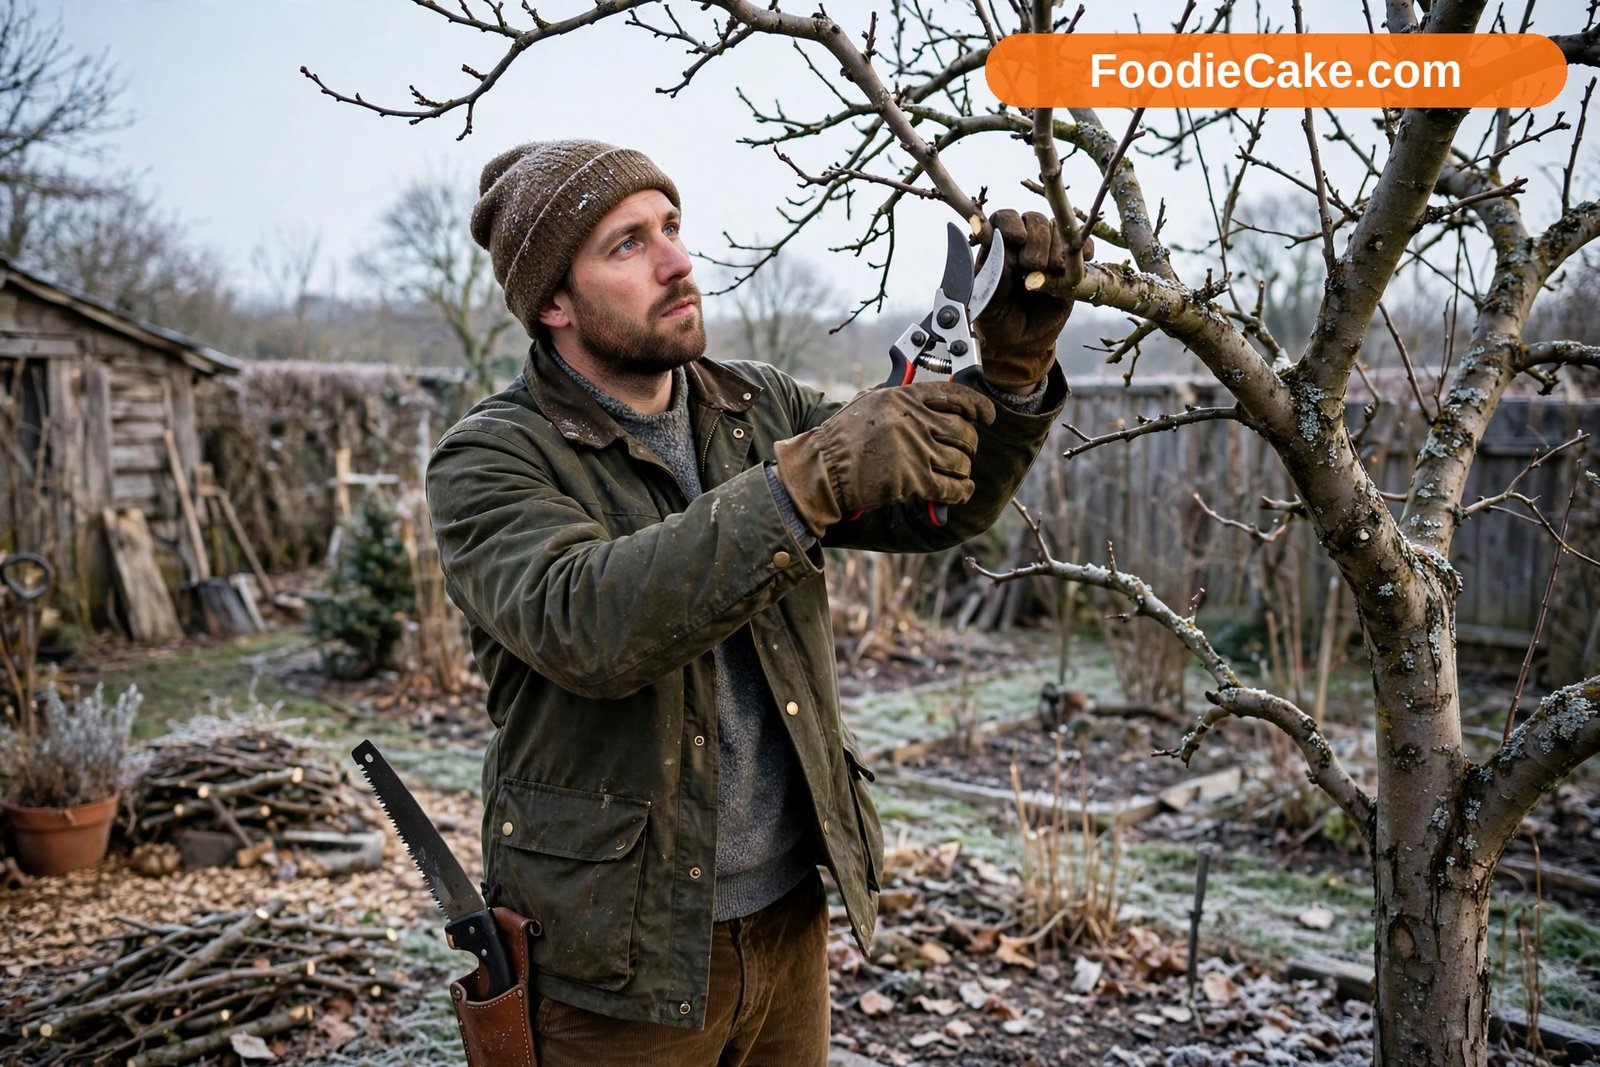
The Tools You Need, and How to Look After Them
You do not need a shed full of equipment, but you do need the right tools, and they do need to be sharp. A blunt blade crushes and tears bark instead of slicing it, and torn bark heals slowly and invites disease. Four tools cover almost every job in a home orchard or garden.
Secateurs, also called hand pruners, handle branches up to about the thickness of your thumb. Bypass secateurs, where two curved blades pass each other like scissors, make the cleanest cut on living wood and are the right choice for fruit trees. Anvil secateurs crush against a flat pad and are better kept for dead wood. Loppers are simply long-handled secateurs: they give you reach and leverage for branches too thick for secateurs and too high to reach comfortably, and a good pair handles most of the work on a mature tree. A pruning saw deals with anything thicker. Look for a curved blade that cuts on the pull stroke, which is safer and easier to control in a tangle of branches. A folding saw is handy and safe to carry; a fixed saw on a pole helps with high branches, though pole work needs patience because it is harder to place the cut precisely.
For very high trees, be honest about your limits. Work from a stable tripod ladder designed for garden use if you are confident, keep three points of contact, never overreach, and never use a chainsaw up a ladder — that job belongs to a professional tree surgeon, and hiring one for an hour on a huge old tree is money well spent.
Sharpness and cleanliness matter as much as the tools themselves. Sharpen blades little and often with a whetstone or sharpening tool, following the existing bevel, and oil the pivot so the action stays smooth. Clean your tools between trees, and always after cutting out diseased wood, because blades carry fungal spores and bacteria from one tree to the next. A wipe with a cloth dampened with rubbing alcohol or a household disinfectant, or a brief dip in a diluted bleach solution followed by drying and oiling, is enough. It takes a minute, and it is one of the simplest disease controls in the whole garden. Wear gloves for protection against thorns and rough bark, and eye protection when pulling cut branches down out of a canopy, because they rarely fall the way you expect.
When to Prune: Timing by Tree Type
Timing is where most pruning advice falls apart, because the honest answer is that it depends on the tree. Pruning at the wrong time rarely kills a healthy tree outright, but it can remove the year’s fruit, encourage a flush of soft growth that winter then damages, or, with stone fruits, open the door to disease. Learn the timing for your tree before you learn anything else.
Apples and pears are the classic dormant-season trees. In zones 5–8, prune them in late winter to early spring, while they are still dormant but the worst cold has passed — roughly February to March in many areas, a little later in colder zones and a little earlier in milder ones. Late winter is ideal because the tree’s structure is easy to see without leaves, the tree is about to grow strongly and will heal cuts as growth starts, and you have not yet removed flower buds that have opened. Avoid pruning in very hard frost, when wood is brittle, and avoid autumn pruning in cold climates, because cuts heal slowly then and new growth encouraged in autumn may not harden before winter.
Stone fruits — plums, cherries, peaches, nectarines, and apricots — are different, and this difference really matters. Prune them in summer, ideally on a dry day in mid to late summer for plums and cherries, because they are vulnerable to silver leaf and bacterial canker, diseases that enter through pruning wounds and spread most readily in damp, cool conditions. Summer pruning, when the tree is in active growth and wounds heal quickly, lowers that risk considerably. Peaches and nectarines, which fruit on wood grown the previous year, are often pruned in spring just as growth starts in colder areas, so that winter damage can be seen and removed and enough new fruiting wood is encouraged. Apricots are among the most disease-sensitive of all, so summer pruning in dry weather is the safest approach for them too.
Figs, grapes, and other fruit follow their own rules. Figs in cold climates are usually pruned in spring once the risk of hard frost has passed, removing frost-damaged tips, because pruning in winter can lose you both growth and the early crop. Citrus trees, where they can be grown, need very little pruning at all beyond removing dead, damaged, or crossing wood, best done after harvest and after frost risk has passed, and anyone learning about pruning container citrus and lemons will find the same light-touch principle applies — citrus resents hard pruning and fruits on current growth, so take off less than you think.
There is also a useful distinction between what winter and summer pruning do to growth. Dormant winter pruning invigorates a tree: remove wood in winter and the tree responds with strong new growth in spring, because its stored energy is shared among fewer buds. Summer pruning calms a tree down: removing leafy growth in summer takes away some of the tree’s ability to make energy, so regrowth is weaker. That is why summer pruning is used to keep trained forms such as espaliers and fans in shape and to slow an over-vigorous tree, while winter pruning is used to stimulate a young or sluggish tree into growth. Same tools, same cuts, opposite effect, depending on the season.
The Basic Cuts: How to Cut Cleanly and Where
Every prune, however complicated the tree looks, is made of the same few cuts. Learn these and you can approach any branch with confidence. The first decision is whether you are removing a whole branch, shortening a branch, or just thinning out small growth, and each has its own technique.
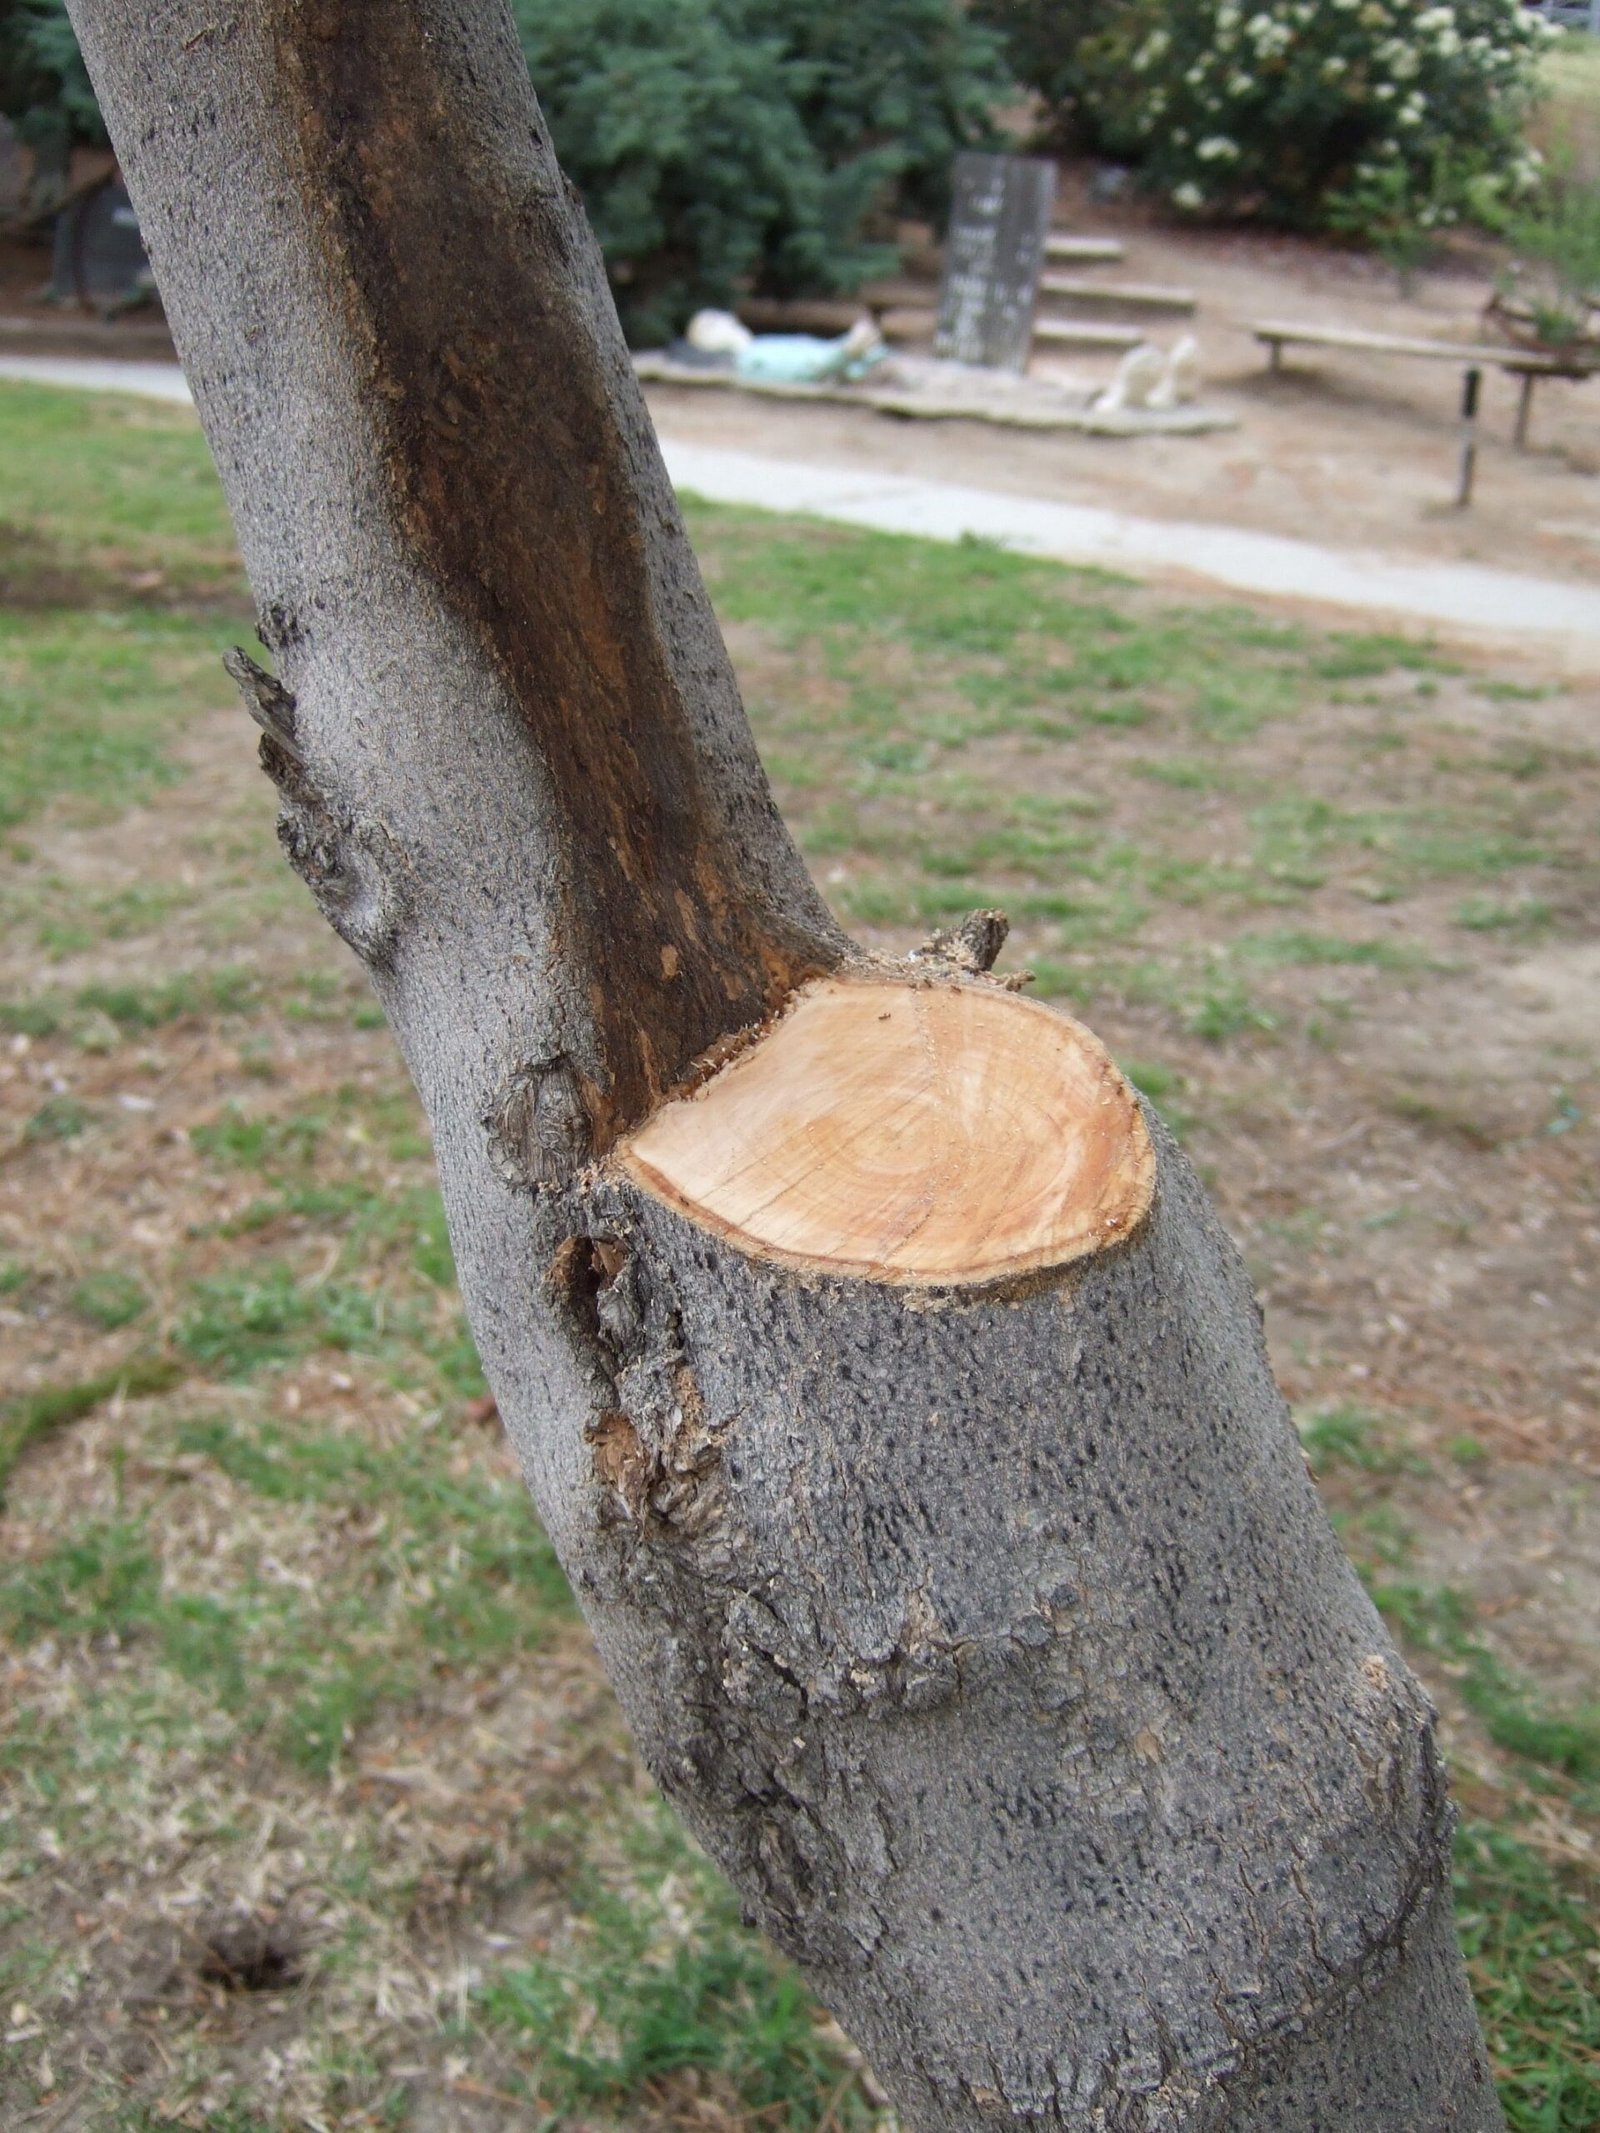
To remove a whole branch, cut it back to its point of origin — either to the trunk or to the larger branch it grows from — without leaving a stub. Stubs are a common beginner error: a few inches of branch left behind cannot heal properly, dies back, and becomes an entry point for rot. Equally, do not cut flush against the trunk. Look closely at the base of a branch and you will see a slightly raised ring of bark, the branch collar. That collar contains the tissue the tree uses to seal the wound. Cut just outside the collar, at a slight angle following its line, and the tree can close the cut as efficiently as it is able. No wound paint or sealant is needed on most cuts; research and modern practice favour letting a clean cut seal naturally, since paints can trap moisture against the wood.
Large branches need the three-cut method to stop the bark tearing down the trunk as the branch falls. First, make an undercut a short distance out from the trunk, sawing upwards about a third of the way through the branch. Second, cut from the top a little further out than the undercut, so the branch breaks away cleanly and the undercut stops any tear. You are left with a short stub, which you then remove with a third, careful cut just outside the branch collar. Never try to hold a heavy branch up with one hand while sawing with the other — let the three cuts do the work safely.
To shorten a branch or a young shoot, cut back to a bud or to a side branch that points in the direction you want new growth to go. Make the cut just above the bud, sloping gently away from it, close enough not to leave a dying stub but not so close that you damage the bud itself. Outward-facing buds are usually what you want on an open-centred tree, because they grow away from the middle and keep the centre open. Thinning cuts, which remove a whole shoot or branch, open the tree up without stimulating much regrowth. Heading cuts, which shorten a branch, stimulate buds just below the cut to grow strongly. Knowing which effect you want before you cut is the difference between pruning and just making a tree smaller.
Start every pruning session the same way: with the dead, damaged, and diseased wood. Dead wood is brittle, bark-free or peeling, and shows no green when you scratch the surface. Damaged wood includes branches broken by wind or by the weight of fruit, and branches rubbing against each other until the bark wears through — where two branches cross and rub, remove the weaker or worse-placed one. Diseased wood, such as cankered sections on apples or dead, blackened tips on plums, should be cut back to clean, healthy wood, and the prunings taken away and disposed of rather than composted, because home compost rarely gets hot enough to make them safe.
Shaping Young Trees: The First Three Years Matter Most
The pruning that matters most happens earliest. A young tree shaped well in its first three years needs only light maintenance for the rest of its life, while a neglected young tree develops weak forks, crowded branches, and a shape you will fight for decades. If you are planting new trees, it is worth choosing forms that suit your space from the start — the compact and trained options among the best fruit trees for small gardens are far easier to prune and pick from than a full-sized tree squeezed into a corner.
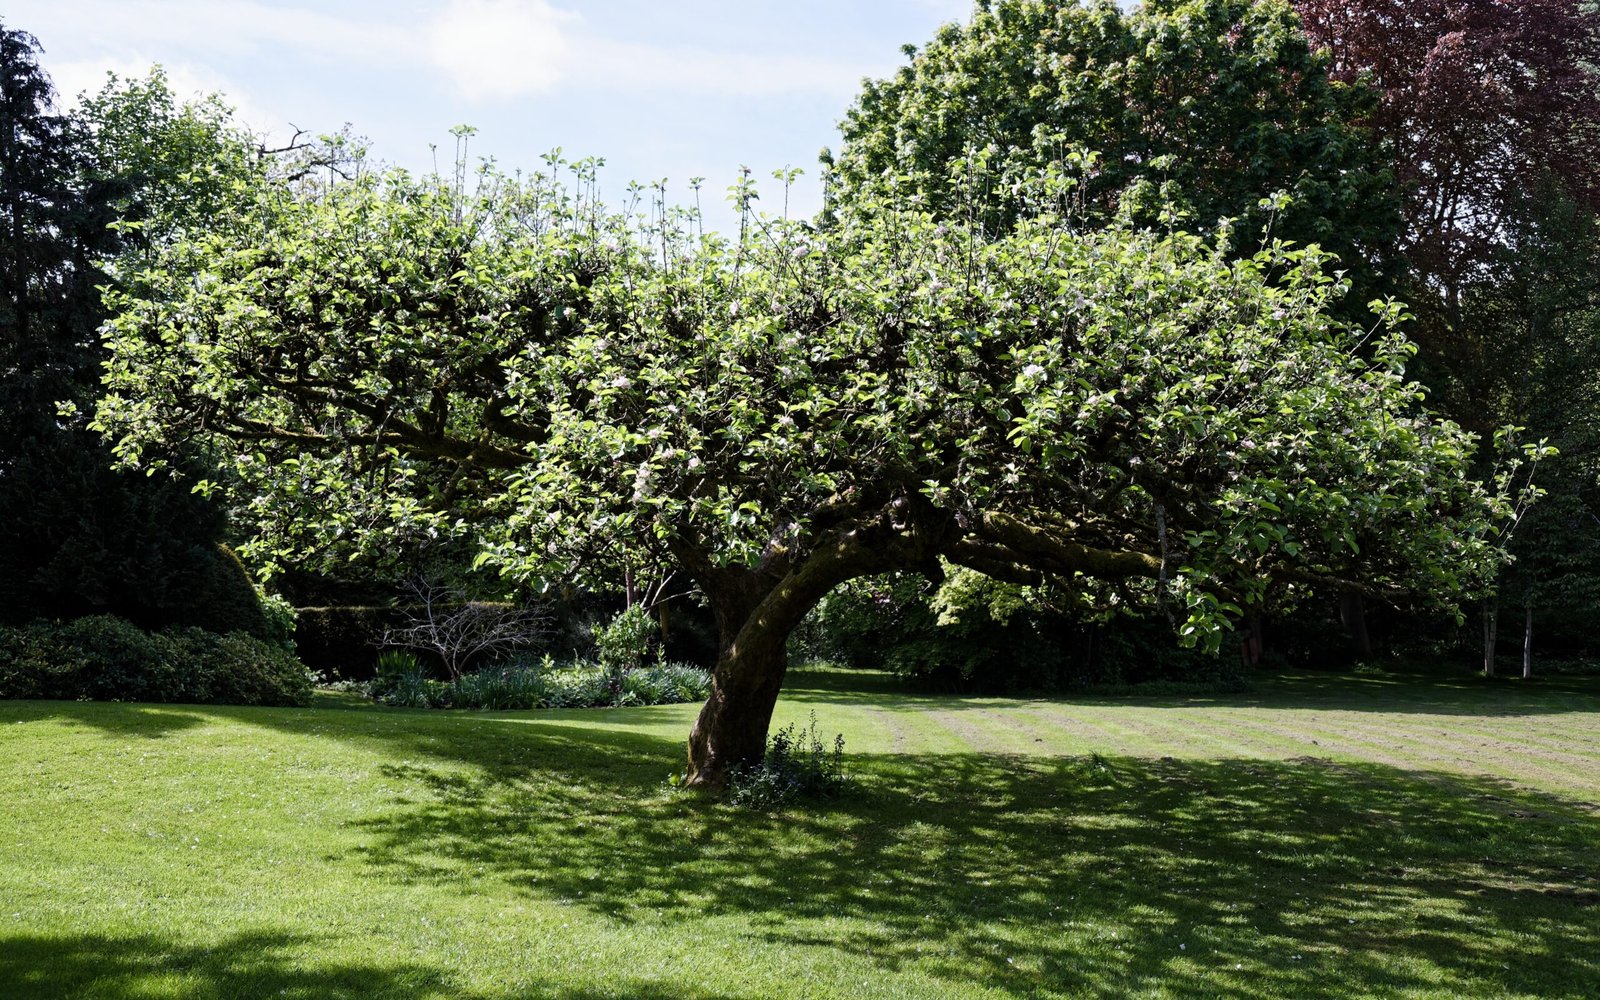
Most garden apple and pear trees are shaped either as a central leader tree, like a small Christmas tree with one upright trunk and tiers of branches, or as an open-centre goblet or bush, where three to five main branches radiate from a short trunk and the middle is kept open to light. The open-centre form suits most home gardeners: it is shorter, easier to prune and harvest, and lets sun reach the fruit. Peaches and plums are almost always grown open-centred for the same reasons. Whatever the form, the principles are shared: one clear structure, well-spaced main branches, and no narrow, tight forks, which are weak points that can split under the weight of fruit or snow.
In the first winter after planting a young feathered tree, shorten the main stem if you are forming a bush tree, to encourage the side branches, called laterals, that will form the framework, and remove any laterals that are very low, very vigorous and upright so they compete with the leader, or growing at a narrow angle to the trunk. Choose three to five strong, well-spaced laterals at wide angles — a wide angle between branch and trunk is strong, a narrow angle is weak and collects bark in the fork. In the second and third winters, shorten the leading shoots of the framework branches by about a third to a half of the previous season’s growth, cutting to an outward-facing bud, and remove crossing, inward-growing, or overcrowded shoots. This sounds like a lot of cutting on a small tree, but it builds the sturdy, balanced skeleton everything else depends on.
After those first years, a young tree moves into maintenance pruning: an annual winter tidy for apples and pears, removing dead and crossing wood, keeping the centre open, and shortening a proportion of the older fruiting wood to encourage fresh growth. Many modern apple varieties fruit on spurs, short stubby growths along the branches, and over years those spur systems become congested and produce smaller fruit. Thinning out some of the oldest, most complicated spur wood every few winters, a little at a time, keeps fruit size up without stripping the tree. Pears are generally pruned more lightly than apples, because they respond to hard pruning with a thicket of upright water shoots, so with pears, take out less and spread the work over more years.
Keeping Mature Trees Productive and Manageable
A mature, well-shaped tree does not need heroic pruning. It needs a regular, light touch. The biggest mistake with mature trees is leaving them for five years and then trying to fix everything in one afternoon, because a tree cut hard in one go responds with a forest of vigorous, upright water shoots that shade the fruit and need removing all over again. Little and often is not just a saying with fruit trees — it is the whole method.
Work through a mature apple or pear each winter in a set order. First, dead, damaged, and diseased wood. Second, crossing and rubbing branches and anything growing straight into the centre. Third, strong upright water shoots in the middle of the tree, though a few well-placed ones can be kept and shortened if you need replacement wood where a branch has died. Fourth, thin crowded spur systems and shorten a few of the oldest fruiting branches back to a younger side branch, which is called renewal pruning. As a rough guide, aim to remove no more than about a fifth of the tree’s wood in a single winter. That ceiling protects you from the water-shoot explosion and keeps the tree fruiting steadily rather than alternating between a huge crop of small fruit and a year of leafy recovery.
Height is the other mature-tree issue. If the top has crept beyond ladder reach, bring it down gradually over two or three winters, each time cutting a tall leading branch back to a weaker, outward-growing side branch at the height you want. Sudden topping — cutting a tall branch straight across at an arbitrary point — produces a tuft of weak, crowded regrowth at the cut and a permanently ugly tree. Cutting back to a side branch at least a third the diameter of the piece removed gives that branch a chance to take over as the new leader and keeps growth natural.
Summer has a role with mature trees too. Removing some leafy growth in summer lets more light onto ripening fruit and can improve colour and flavour, and it is the time to shorten the long, whippy new shoots on trained trees such as espaliers, fans, and cordons. On a cordon or espalier, cut the new side shoots back to a few leaves in mid to late summer once the base of the shoot has turned woody, and tidy any regrowth again in winter. Trained forms look precise, but the pruning rule behind them is actually simpler than free-standing trees: framework stays, fruiting side shoots get shortened.
Renovating Old and Neglected Trees
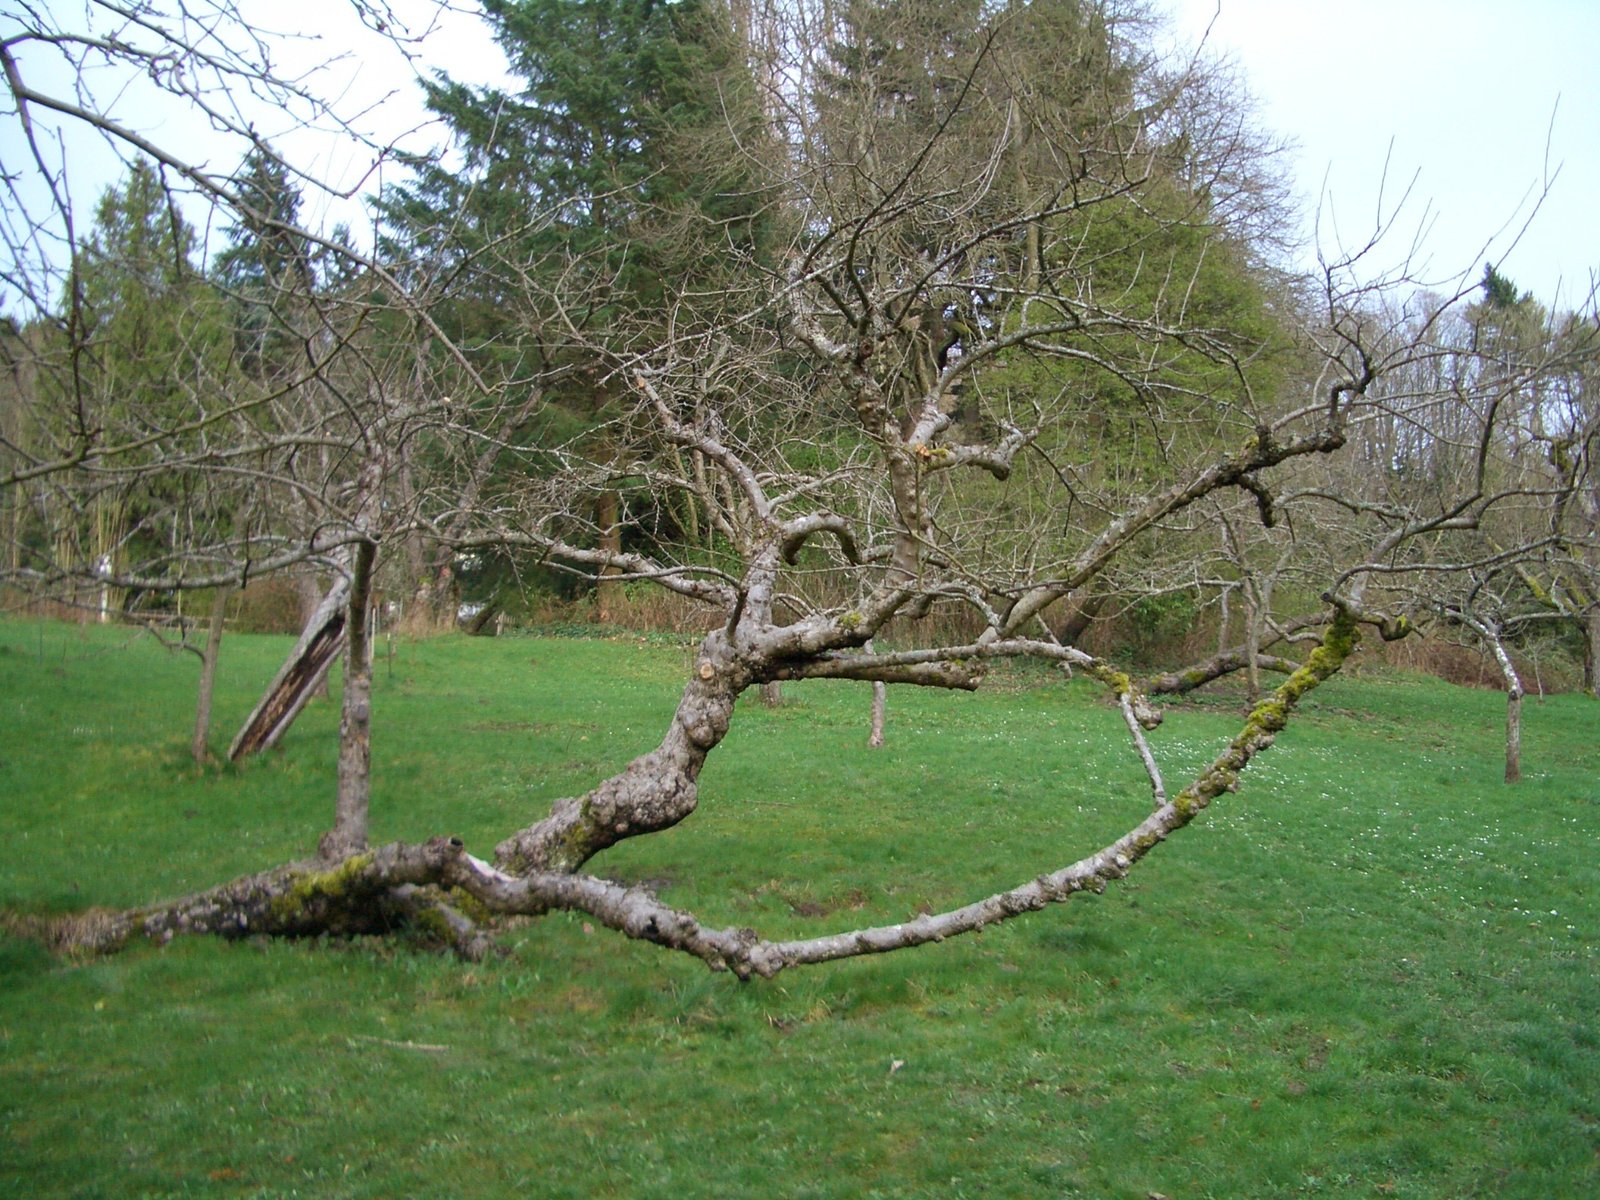
Old fruit trees are worth saving. An ancient apple with a hollow trunk can still crop for years, and its blossom and character are part of the garden. Renovation is entirely possible — it just has to be spread over time. The single worst thing you can do to a neglected tree is cut away half of it in one winter in the name of decisiveness. The tree responds with masses of vigorous upright growth, stops fruiting properly, and can be genuinely weakened. Plan on two to three years for a badly overgrown tree, and accept a lighter crop during the process.
In the first winter, do only the essentials: remove dead, broken, and diseased wood, take out the worst crossing branches, and open the centre enough for light and air to get in. Remove one or two large branches at most, using the three-cut method, and choose branches whose removal opens the most space for the least cutting. Step back often, because once the dead wood is gone the tree often looks far less hopeless than it did when you started.
In the second winter, continue thinning the crowded areas, shorten some of the tall leaders back to outward side branches to begin bringing the height down, and start selecting which of the vigorous new shoots that appeared after the first prune are worth keeping as replacement branches. Keep the well-placed, outward-growing ones, remove the rest while they are still small, and shorten any you keep to an outward bud to direct them. By the third winter you should be close to normal maintenance pruning: a balanced framework, light in the middle, and fruiting wood you can reach and renew a little each year.
Throughout renovation, look after the tree in other ways. Clear grass and weeds from around the trunk out to the drip line, because grass competes hard for water and nutrients, and mulch that area with compost or well-rotted manure in spring, keeping the mulch a few inches away from the trunk itself. Water a renovated tree in prolonged drought, since a tree putting energy into healing and regrowth feels dry weather more than a settled one. And be patient about fruit: renovated trees often crop lightly for a season or two and then return to good harvests of noticeably larger, better-coloured fruit, because the light is finally reaching them.
Practical Tips for Better Pruning
Prune on a dry day whenever you can. Cuts made in dry weather heal in better conditions, you are less likely to spread disease on wet bark, and the whole job is more pleasant. For stone fruits this is not just comfort, it is disease prevention.
Step back constantly. After every few cuts, walk a few paces away and look at the whole tree. The shape you are making is only visible from a distance, and most over-pruning happens because the gardener stayed nose-to-branch for an hour and kept finding one more branch to remove.
Keep a simple annual rhythm. Winter for apples and pears, summer for plums and cherries and for trained forms, spring for a quick check for frost and winter damage as buds break. A rhythm tied to the season means pruning becomes a short, familiar job instead of a dreaded event.
If you are unsure whether a branch should go, leave it. Mark it with a tie of coloured wool if you like, watch how it fruits and how much light it blocks through the season, and decide next year with real information. Hesitation costs a season; a wrong cut costs several years.
Collect and clear prunings as you go rather than leaving a tangle under the tree. Healthy small wood can be chipped for mulch or paths. Diseased wood should leave the garden entirely, through the municipal green waste or by burning where that is permitted, never through the home compost heap.
Common Mistakes and Problems, and How to Fix Them
Pruning at the wrong time of year is the most frequent problem. Winter-pruned plums and cherries are far more likely to suffer silver leaf, a disease that shows as a silver sheen on leaves and can kill branches or the whole tree. If you have inherited a stone fruit pruned hard in winter, you cannot undo it, but you can prune only in dry summer weather from now on, keep tools scrupulously clean, and cut out any silvered branches in summer, back to healthy wood, as soon as you spot them.
Leaving stubs and cutting flush are opposite errors with the same result: wounds that do not seal well. Stubs die back and rot inwards; flush cuts remove the branch collar and create a much larger wound than necessary. Revisit any stubs you spot from previous years and cut them properly just outside the collar — the tree will do a better job with a fresh, correct cut than with a rotting peg.
Taking off too much at once produces the thicket of water shoots many gardeners blame on the tree. Those vigorous, upright, leafy shoots are the tree replacing lost leaf area as fast as it can. If you have inherited that thicket, do not cut it all off in winter, which restarts the cycle — instead, remove some in summer, thin the rest in winter, and keep the best-placed shoot where you need a replacement branch. Within two seasons the growth usually calms.
Pruning off the fruit is an easy beginner mistake once you learn that different trees fruit on different wood. Peaches and nectarines fruit on the previous year’s growth, so cutting away all of last summer’s shoots removes the crop; apples often fruit on older spur wood, so stripping the spurs does the same. Before pruning an unfamiliar tree, check where it fruits, and if in doubt prune lightly that year and observe which wood carries the blossom in spring.
Neglecting tool hygiene spreads problems quietly. Canker on apples and bacterial canker on stone fruits both travel on blades. If you cut out a cankered section, clean the saw before the next cut on healthy wood, and work on diseased trees last in a pruning session, not first.
Frequently Asked Questions
How much should I prune off a fruit tree each year?
As a general guide, remove no more than about a fifth of the living wood in a single year on a mature tree. Young trees being shaped can have their new leading shoots shortened by a third to a half, which is a different kind of cut. If a tree needs more work than that, spread it over two or three years.
Can I prune a fruit tree in autumn?
It is better to wait. In cold climates, autumn cuts heal slowly and pruning can encourage growth that winter then damages. Late winter, just before growth starts, is the best window for apples and pears in zones 5–8. Stone fruits should wait for dry summer weather regardless, because of disease risk.
Do I need to paint pruning cuts?
No, in most cases. A clean cut made just outside the branch collar seals best when left alone. Wound paints and sealants can trap moisture against the wood and do not reliably prevent disease. Focus instead on sharp tools, correct placement of the cut, and pruning in dry weather.
Why did my tree grow lots of thin upright shoots after pruning?
Those are water shoots, the tree’s response to heavy pruning. Hard cutting removes leaf area the roots are still supplying, so the tree pushes out vigorous upright growth to replace it. Thin them over the next summer and winter rather than all at once, and prune more lightly in future to prevent the cycle repeating.
My apple tree only fruits every other year. Can pruning help?
It can. Biennial bearing, a heavy crop one year and almost nothing the next, is common in apples and is made worse by a crowded tree carrying too much fruiting wood. Thinning congested spur systems in winter and thinning the fruitlets in a heavy year, removing some young fruit so the tree is not exhausted, helps even out the cycle over a few seasons.
Final Thoughts
Pruning a fruit tree well is mostly about understanding what the tree wants and negotiating with it. It wants to grow up and out and make seed; you want light in the middle, fruit you can reach, and a tree that stays healthy for decades. A few correct cuts each year, made with sharp tools at the right season for that type of tree, achieve both surprisingly easily.
If you are standing in front of your first unpruned tree feeling daunted, start with the dead, damaged, and diseased wood and nothing else. Clear that, step back, and the tree will already look better, and the next decisions will be clearer. Confidence in pruning does not come from reading; it comes from one careful season at a time — and the tree, pruned thoughtfully and never butchered, will forgive the occasional imperfect cut and reward you with blossom, shade, and fruit for years.