

If you want to learn how to grow garlic at home, start with this: garlic is one of the most patient, forgiving crops you can plant. You set individual cloves in the ground in autumn, leave them mostly alone through winter, watch green shoots race up in spring, and lift fat bulbs in early summer. There is no staking, no daily picking, and no complicated pruning.
What catches beginners out is timing and type, not skill. Garlic planted late in spring rarely sizes up, because it needs a period of cold to form a bulb divided into cloves. A variety bred for mild winters may also disappoint in a hard northern freeze, while one that needs a long chill may produce a small, undivided round where winters are warm. Get the type right for your climate, plant at the right moment, and the rest is mostly weeding, watering, and waiting.
This guide covers the whole season in order: choosing types and varieties, preparing soil, planting, feeding, cutting scapes, harvesting, and curing bulbs so they keep for months. Timing is tied to zones and frost, because an October planting day in zones 5–7 can be a November or December job in warmer zones 9–10.
Step 1: Choose Between Hardneck and Softneck Garlic
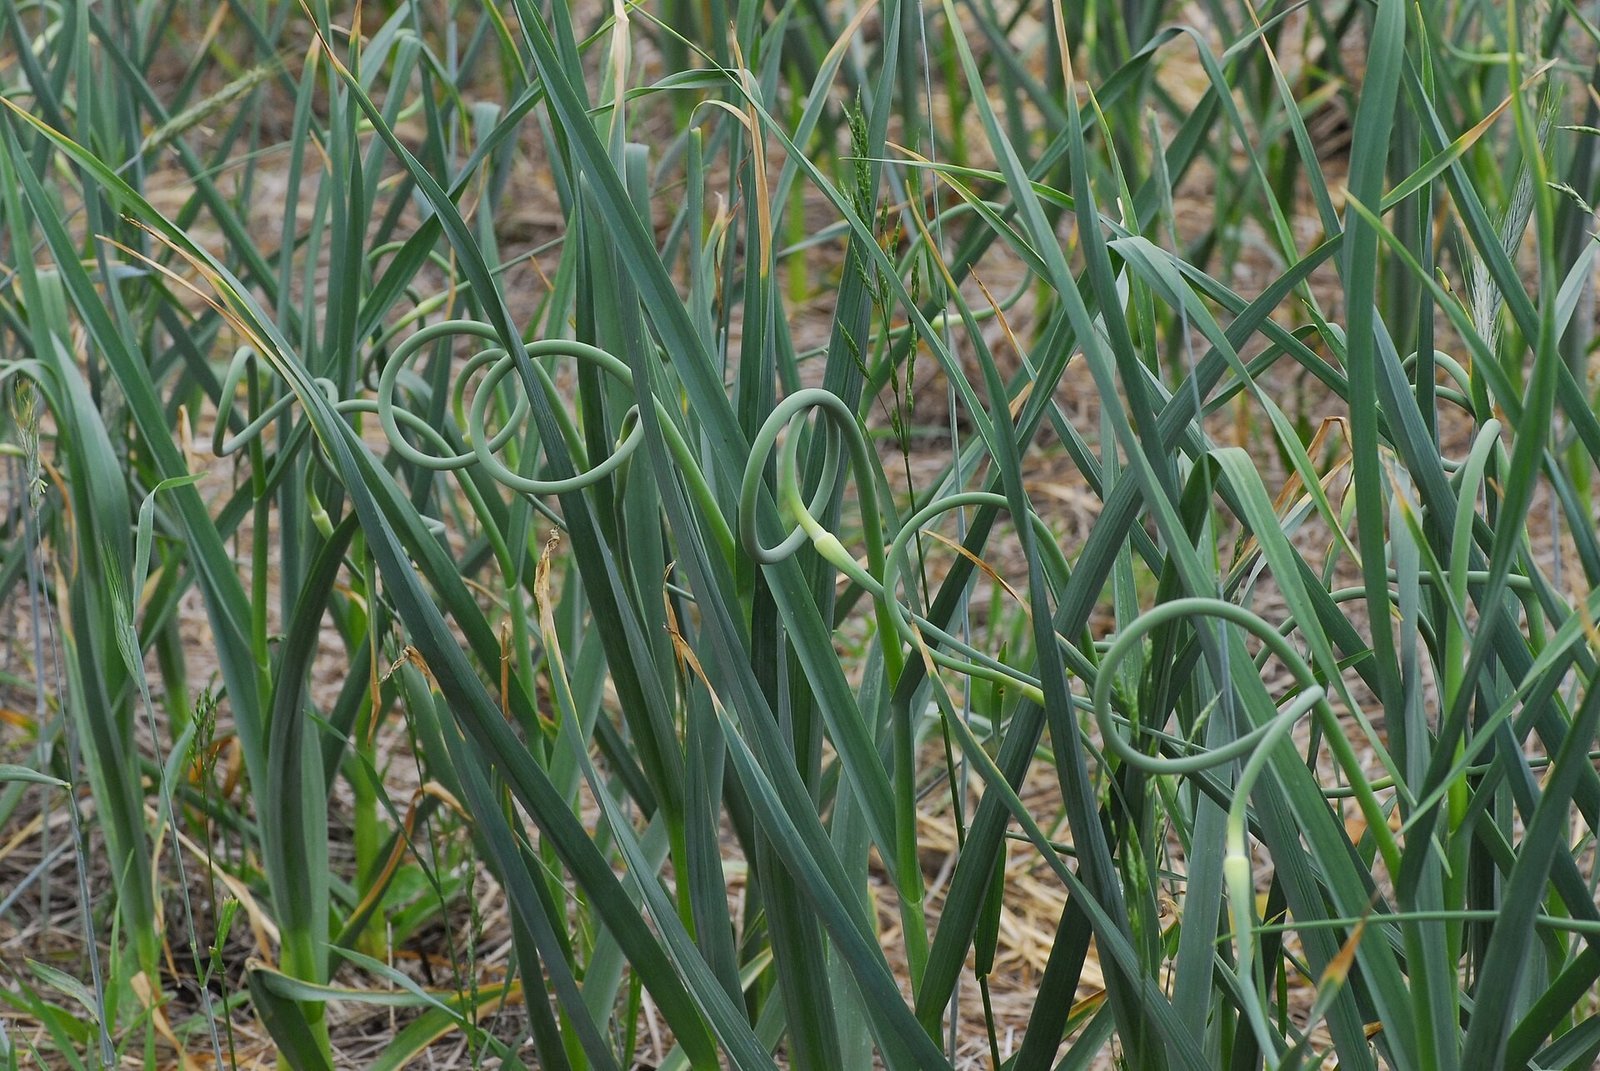
Hardneck garlic sends up a stiff central flower stalk in late spring, called a scape, which curls into a loop before straightening. Its bulbs usually have one ring of large, easy-to-peel cloves, often six to ten per bulb, with strong, complex flavours. The trade-off is storage: most hardnecks keep for around four to six months after harvest.
Softneck garlic has no stiff stalk, which is why it can be braided into strings. Its bulbs carry more cloves, often twelve to twenty, with smaller cloves in the centre and fiddlier skins. Softnecks are generally milder, very productive, and store the longest, often eight months or more.
Climate should decide your main crop. In zones 5–7 and colder areas with reliably cold winters, hardnecks are the natural first choice — they need that chill and tolerate deep cold well once mulched. In warmer zones 9–10, softnecks usually perform better because they need less cold to bulb properly. In zone 8, many gardeners grow both, accepting that hardnecks may size a little smaller after a very mild winter. If you are also laying out your first beds, place garlic within a wider plan for starting a vegetable garden so a sunny bed is still free when autumn planting arrives.
Step 2: Pick Named Varieties Worth Growing
Among hardnecks, Music is a widely recommended Porcelain type with large, plump cloves, usually four to six per bulb, strong flavour, and good cold tolerance. German Extra Hardy, also sold as German White, is another Porcelain known for vigour in cold climates and a rich, hot flavour raw that mellows when roasted. Chesnok Red, a Purple Stripe type, is excellent roasted, holds its flavour well, and has attractive purple streaking. Rocambole types such as German Red are loved for full, earthy flavour and easy peeling, though they store for a shorter time and prefer consistently moist soil.
Among softnecks, California Early is a reliable, early-maturing Artichoke type, mild and productive, and a sensible choice for zones 8–10. California Late matures later and stores very well. Inchelium Red has a richer flavour than many softnecks and adapts to a wide range of climates. Silverskin types such as Nootka Rose suit gardeners who prize long storage above all; they are often the last harvested and the last still sound months later.
Buy seed garlic from a garden supplier rather than planting supermarket bulbs, which may be treated to suppress sprouting, come from a very different climate, or carry disease into your soil. Choose firm, heavy bulbs with tight wrappers and no soft spots or mould. Plant the biggest cloves and cook with the small inner ones — large cloves generally grow the largest new bulbs.
Step 3: Understand Vernalisation and Planting Time
Garlic needs cold, called vernalisation, to divide into separate cloves instead of growing one round, onion-like bulb. Most hardnecks want weeks with soil temperatures below about 40°F. Softnecks need less, which is why they succeed where winters are mild, but even they bulb more reliably with some chill.
Plant in autumn, about four to six weeks before the ground freezes hard — late enough to avoid lots of top growth before winter, early enough for roots to establish. In zones 5–7 that usually means October into early November, a few weeks after the first frost. In zones 8–9, planting often shifts to November. In warmer zones 9–10, many gardeners plant in late November or December, and some chill softneck bulbs in a paper bag in the refrigerator for several weeks beforehand to make up for a short winter.
Spring planting is a fallback, not a plan. Plant as early as the soil can be worked and expect smaller bulbs. In very cold zones 3–4, plant a little deeper, mulch heavily once the ground begins to freeze, and choose the hardiest Porcelain varieties.
Step 4: Prepare the Soil for Strong Bulbs
Garlic grows best in full sun, in loose, well-drained soil rich in organic matter. It dislikes sitting in water over winter, so avoid a soggy corner that puddles after rain. On heavy clay, a raised bed is a genuine advantage. On sandy soil, add plenty of compost to hold moisture and nutrients through spring.
Aim for a soil pH around 6.0 to 7.0. Work in 2 to 3 inches of finished compost before planting and loosen the soil 8 to 10 inches deep so roots and swelling bulbs are not fighting compaction. Avoid fresh manure in autumn, which can encourage rot; well-rotted compost is safer. A balanced organic fertiliser at the packet rate is enough at planting if your soil is poor — garlic does most of its serious feeding in spring.
Rotate the bed. Do not plant garlic where onions, leeks, shallots, or garlic grew in the previous three years if you can avoid it, because alliums share pests and diseases, including white rot, which persists in soil for a long time. A bed that grew beans, salads, or brassicas last season makes a better home.
Step 5: Plant Cloves at the Right Depth and Spacing
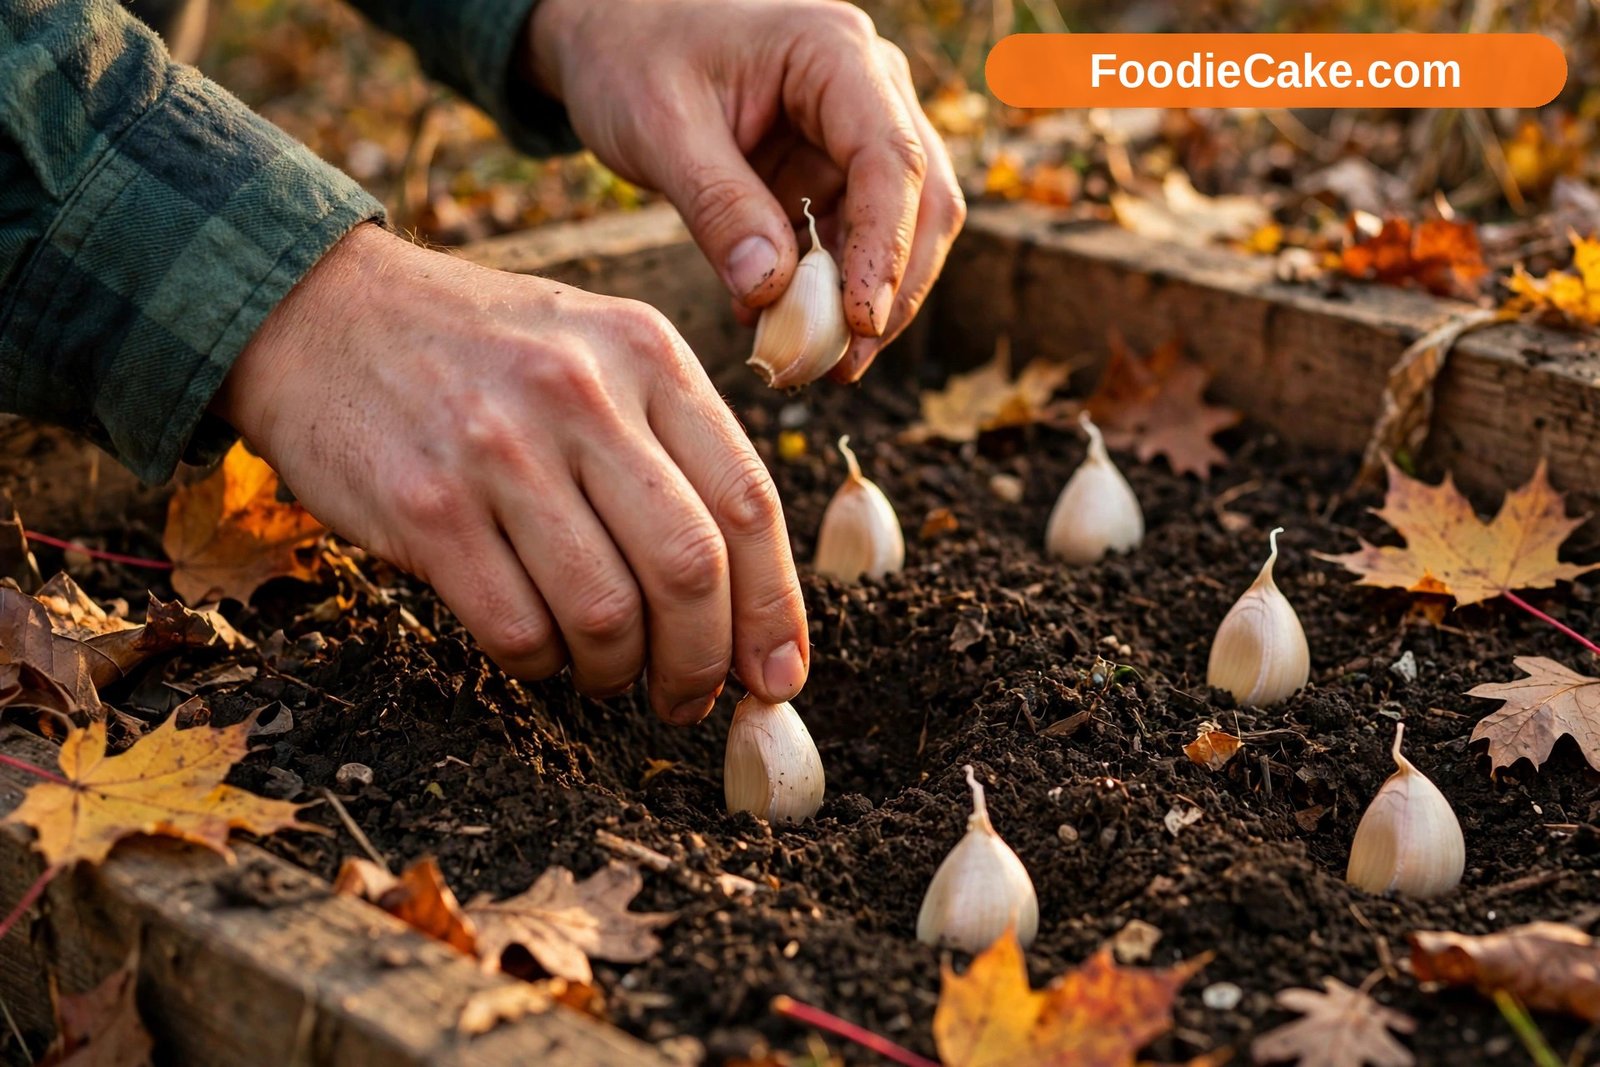
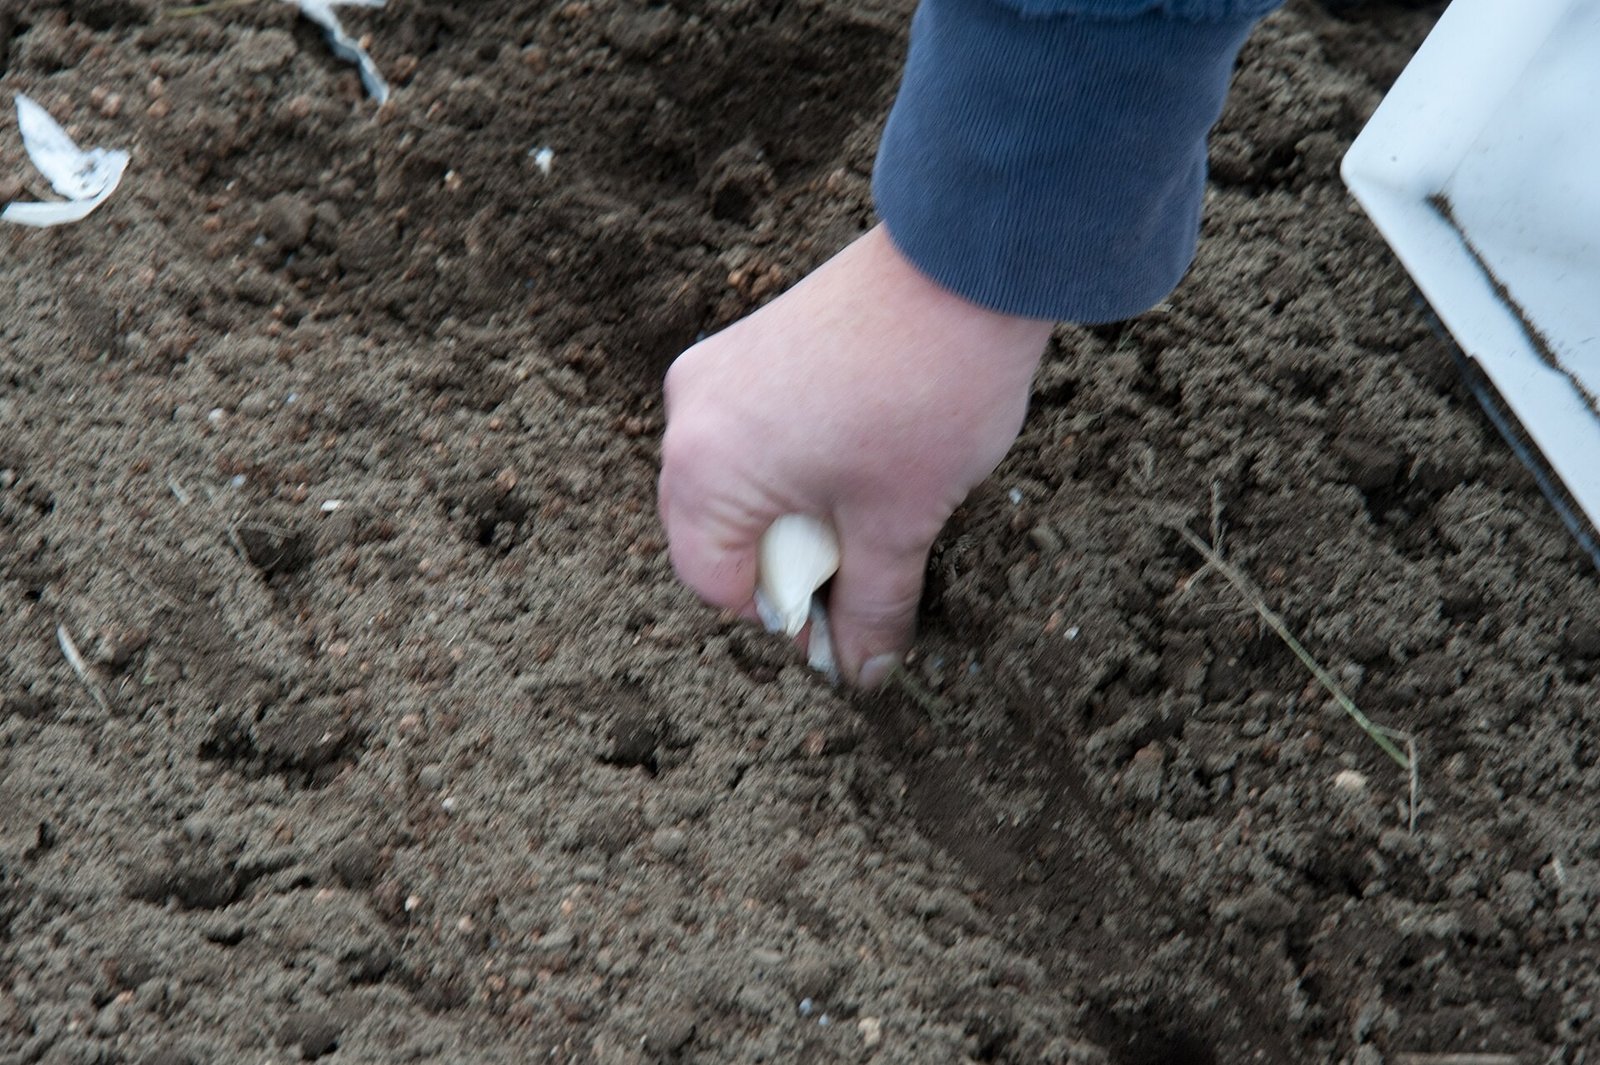
Break bulbs into individual cloves on the day you plant, or the day before at most, keeping the papery skin on each clove. Every clove goes in pointed end up, flat root end down. An upside-down clove often still grows, bending around on itself, but it wastes energy and frequently produces a smaller, misshapen bulb.
Set cloves about 2 inches deep in mild climates and 3 to 4 inches deep where winters are cold, measuring to the tip, then cover with soil. Space cloves about 6 inches apart in all directions, or in rows 8 to 12 inches apart. That can feel generous in October, when a clove is the size of your thumb, but by May the leaves need the air and light, and the bulbs need room to swell. Closer spacing almost always means smaller bulbs.
Water well after planting if the soil is dry, then mulch with straw or shredded leaves about 3 to 4 inches deep once settled. In cold areas mulch cushions temperature swings, reduces frost heaving, and holds moisture; in zones 9–10 a thinner layer is plenty. A comparison of the best mulch for vegetable gardens helps you weigh straw against leaves or compost for a bed occupied for nine months. Green shoots a few inches tall before winter are normal — do not cut them back. The tops may brown at the tips in hard frosts, but the plant will surge again in spring.
Step 6: Care for Garlic Through Winter and Spring
Winter care is mostly leaving the bed alone. Keep the mulch in place, check it has not blown off after storms, and avoid walking on the bed, which compacts wet soil. In an unusually dry winter in a mild climate, water if the soil dries several inches down; elsewhere, winter rain and snow are usually enough.
In spring, as shoots grow strongly, pull thick, matted mulch slightly back from the stems so the soil can warm and necks stay drier, but keep it between plants for weeds and moisture. Weeding matters more than almost anything else now. Garlic has shallow roots and narrow leaves that cast no shade, so it competes badly. Hoe very shallowly or hand-weed, a little and often — deep hoeing close to rows cuts garlic roots.
Water about an inch a week in spring while bulbs are forming, deeply at soil level in the morning, adjusting for rain. As harvest approaches and lower leaves yellow, ease off: wet soil in the final two or three weeks encourages mould on the wrappers and makes lifting muddy.
Step 7: Feed at the Right Moments
Garlic is not greedy in autumn, but in spring it grows fast and appreciates nitrogen while building leaves — each healthy leaf supports the bulb forming below. A practical schedule is one application of a nitrogen-rich organic feed as growth resumes in early spring, and a second four to six weeks later if growth looks pale or slow.
Options include blood meal used sparingly at the packet rate, a balanced organic granular fertiliser scratched into the surface between rows and watered in, or a liquid seaweed or fish feed for a gentler top-up. Avoid feeding late, once bulbs are swelling in late spring: extra nitrogen then pushes soft leafy growth, and can delay maturity and curing. Deep green, upright growth means the plants are fine. Yellowing very early in spring usually means hunger or waterlogging — check soil moisture with a finger before feeding, because those two causes need opposite fixes.
Step 8: Cut the Scapes and Enjoy Them
Only hardnecks produce scapes. In late spring, roughly a month before harvest, the central stalk emerges and loops into a curl. Cut it when it has made about one full curl, leaving an inch or two of stalk above the top leaf. Cut too late, once the stalk has straightened and hardened, and the plant has spent energy on flowering that you wanted in the bulb.
Treat scapes in the kitchen like a garlicky green bean crossed with a spring onion. Chop them into stir-fries, blend them into pesto with nuts and hard cheese, grill them whole with oil and salt, or pickle the tender pieces. They keep for a couple of weeks in the refrigerator and freeze well chopped, for soups. If you leave one or two uncut, tiny bulbils form at the top; those can be planted, but they take two seasons to reach full size, so treat them as a curiosity rather than a shortcut.
Step 9: Harvest When the Leaves Tell You
Harvest by leaves, not by date. In zones 5–7 harvest often falls in late June to July; in warmer zones 9–10 it may be May to June, with softnecks such as California Early first and late Silverskins last. Each green leaf corresponds to a papery wrapper around the bulb, and as the bulb matures the lowest leaves yellow and brown and those wrappers begin to decay.
The sweet spot is when roughly half the leaves are still green and the bottom three or four have browned. Wait until nearly all are brown and wrappers may have rotted, leaving bare cloves that store poorly. Lift too early and bulbs are undersized, with thick, immature wrappers. If in doubt, lift one test bulb: in a mature bulb the cloves are well defined and fill their skins; in an immature one they look thick-skinned and the bulb feels like a solid mass.
Dig, do not pull, sliding a fork under the bulb to loosen the soil. Work on a dry day if you can. Brush off loose soil by hand, but do not wash bulbs or bang them against a boot — a bruised bulb rots in store. Leave roots and tops on for curing, and move bulbs out of direct sun the same day, because they scald quickly on hot soil.
Step 10: Cure and Store Your Garlic Properly
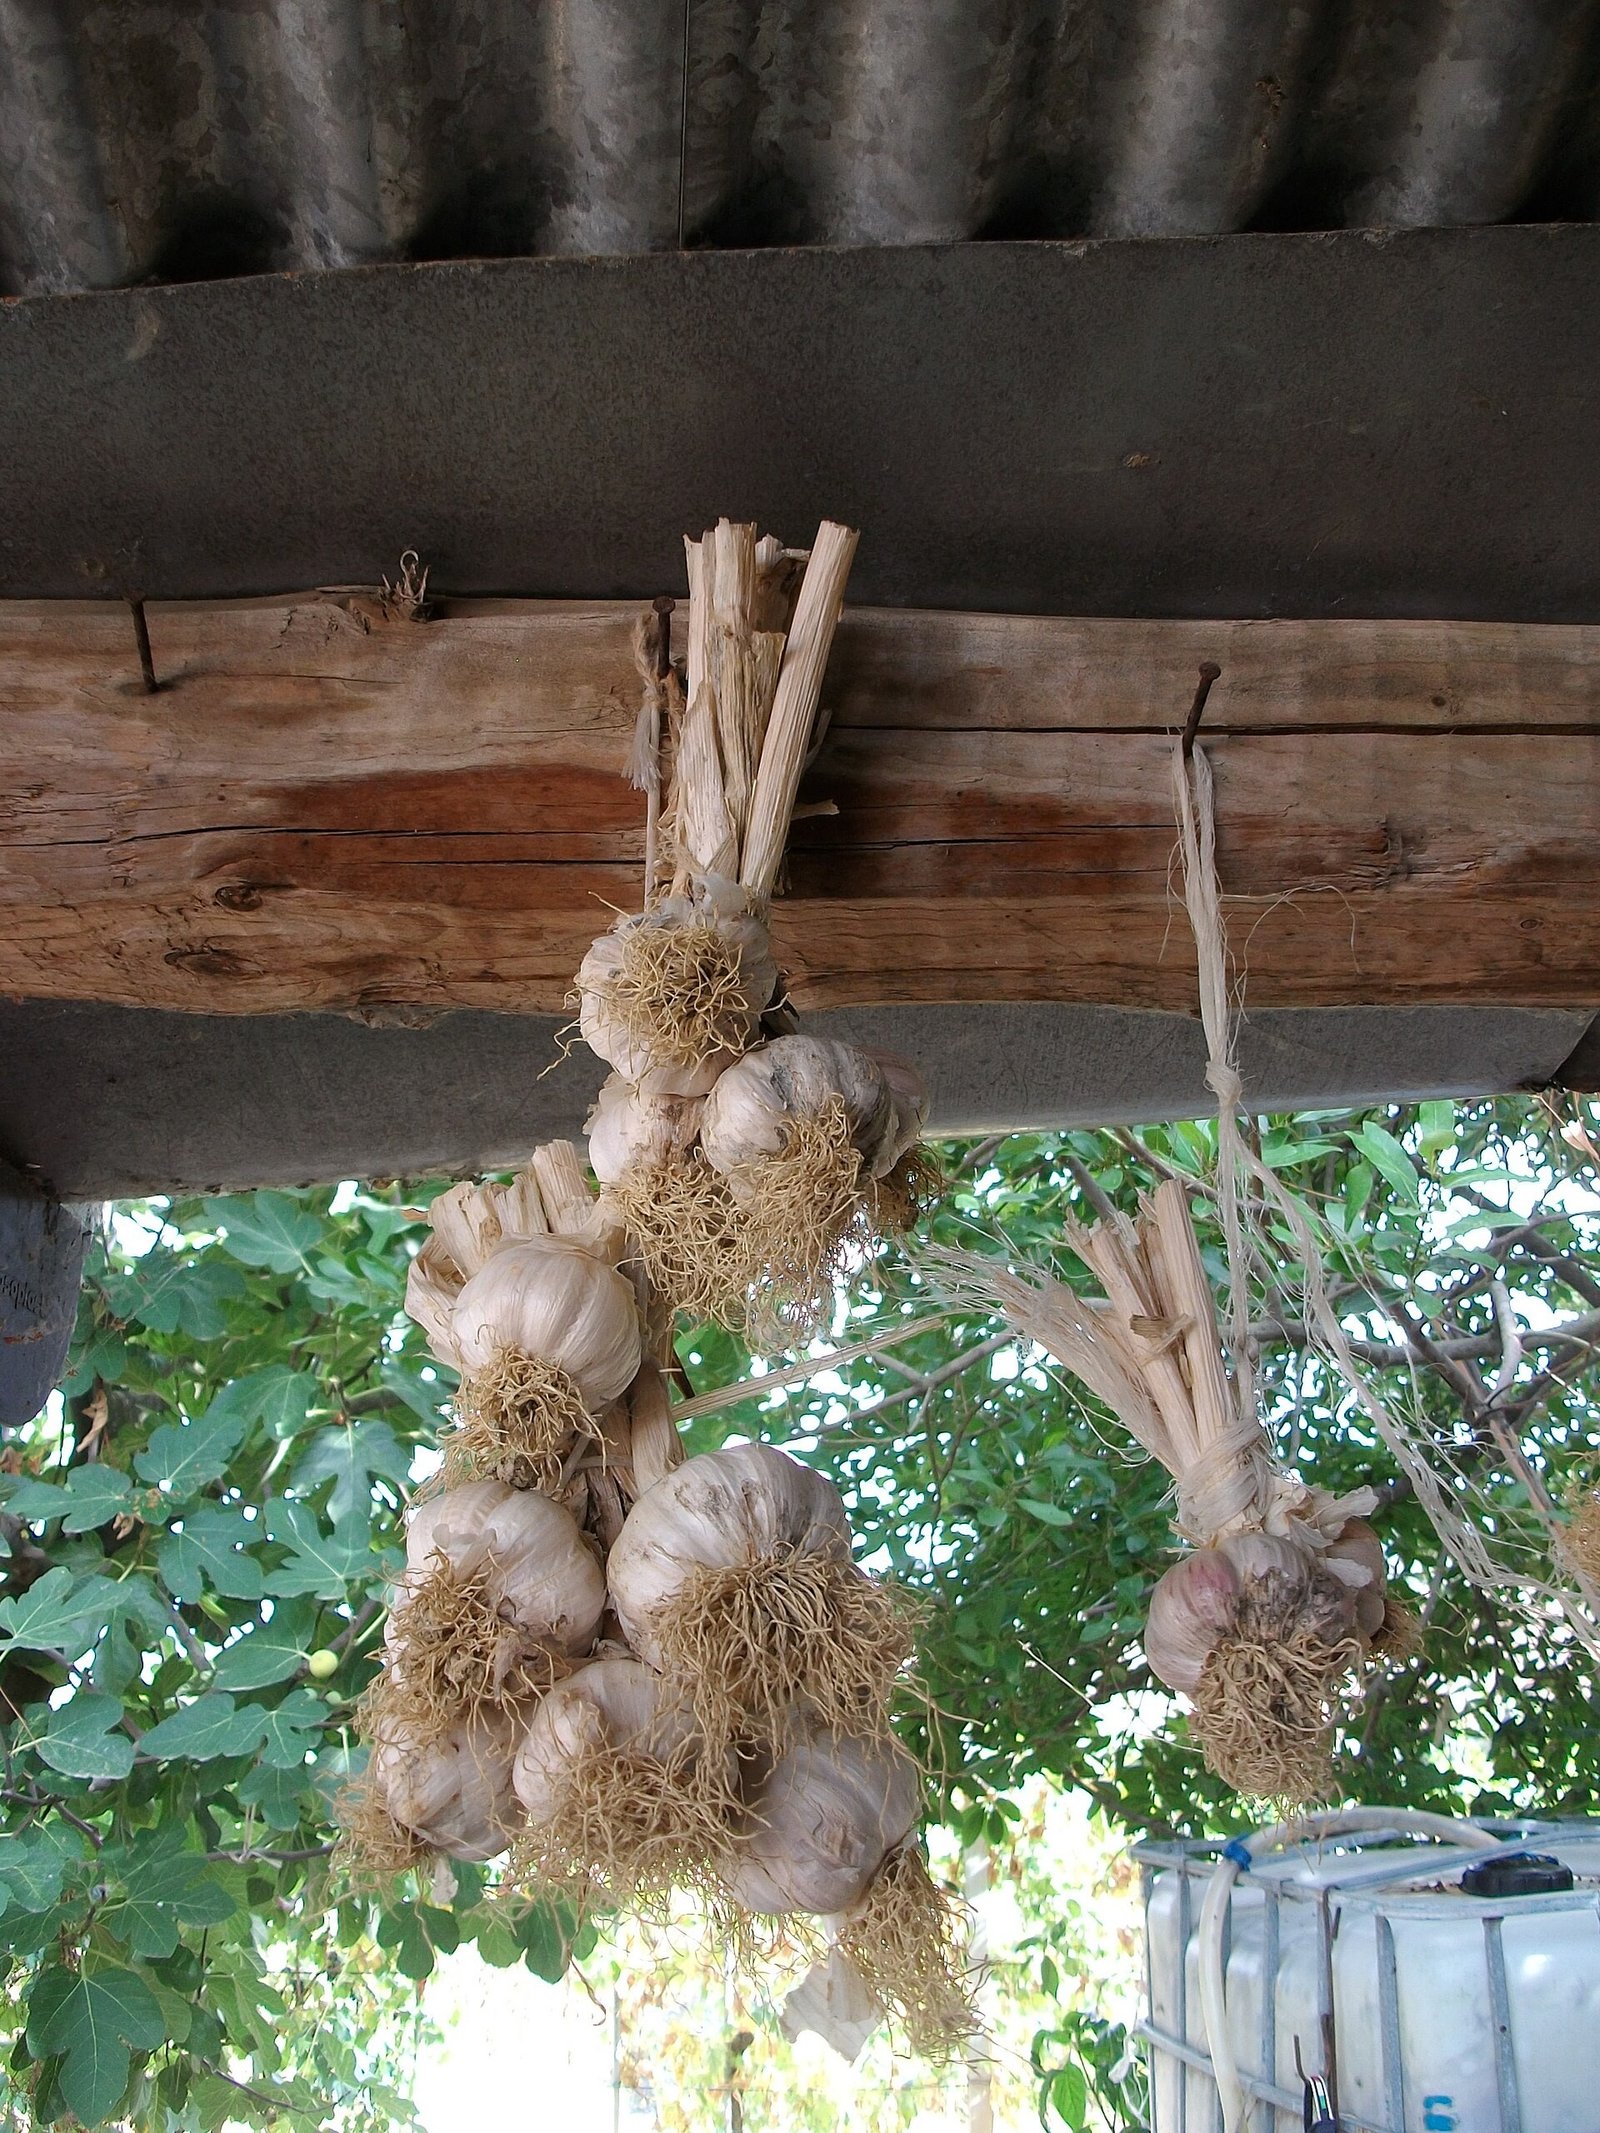
Curing turns a freshly dug bulb into one that keeps. Lay bulbs in a single layer on a screen or slatted shelf, or hang them in small bundles, somewhere warm, dry, and shaded with good air movement — a covered porch, an airy shed, or a spot near a fan indoors. Keep tops and roots on; the bulb dries from the neck down.
Curing takes about three to four weeks in dry weather, longer in humid air. It is done when wrappers feel papery and rustle, necks are fully dry and tight, and roots are wiry and brittle. Then cut the stalk about an inch above the bulb, trim roots close, and brush away the outer dirty wrapper if you wish. Softnecks can be braided before their tops turn brittle and hung to finish drying.
Store cured garlic somewhere cool and dry with air moving, around 60–65°F if you can, in mesh bags or open baskets. Never keep whole bulbs long-term in a sealed plastic bag or the refrigerator, where cold and damp encourage sprouting and mould. Expect hardnecks to keep roughly four to six months and softnecks eight months or more. Save your biggest, healthiest bulbs as seed for autumn, and eat smaller or slightly damaged ones first.
Practical Tips for Bigger, Better Garlic Bulbs
Plant a little more than you think you need. Garlic stores well and asks little once established, so a generous patch means prime seed to save, plenty for the kitchen, and some to give away.
Label every row with variety and planting date, and note in midwinter which varieties are still firm in store. Storage life is the trait you cannot judge at harvest, and that note should lead next autumn’s choices more than any catalogue description.
In very wet winter soil, plant on a low ridge a few inches high along the row. It keeps the base of the plant out of standing water during the wettest weeks. And be honest about cleanup: pull any plant that is stunted or covered in orange rust pustules and bin it rather than composting it. Removing one sick plant early can protect the rest of the row.
Common Mistakes When Growing Garlic at Home
Planting supermarket garlic in spring is the classic error — wrong season, wrong source, wrong expectations. Buy proper seed garlic and plant in autumn, and the same bed will look entirely different.
Planting too shallow, or upside down, comes next. Shallow cloves in cold areas get heaved out by freezing and thawing and may sit on the surface by midwinter. In cold climates, skipping mulch has the same effect: beds swing between frozen and thawed, roots tear, and some cloves rot. In damp climates, the opposite mistake is leaving thick, wet mulch packed against stems all spring, keeping necks too wet.
Harvesting too late ruins more good garlic than pests do. Beginners wait for the tops to die completely, as with onions, then find split bulbs with decayed wrappers. Garlic is not an onion: lift when about half the leaves are still green. White rot, which shows as fluffy white growth at the base with small black specks, has no reliable home cure — lift and destroy affected plants, clean your tools, and do not grow alliums in that spot for many years. Clean seed and rotation are the real defences.
Frequently Asked Questions
Can I grow garlic in containers?
Yes, in a pot at least 8 to 10 inches deep with drainage holes, spacing cloves 4 to 6 inches apart in potting mix with compost added. Softnecks suit pots in mild climates; hardnecks need the pot left outdoors through winter cold. Water pots carefully, as they dry and freeze faster than beds, and feed in spring.
How long does garlic take to grow?
From autumn planting to summer harvest is roughly eight to nine months, though the plant grows slowly or rests through much of winter. Spring-planted garlic finishes sooner on the calendar but usually gives smaller bulbs, because it misses the long root-building and chilling period.
Why did my garlic grow one round bulb instead of cloves?
A single round bulb usually means the plant did not get enough winter cold, was planted too late in spring, or started from a very small clove. Rounds are perfectly edible and mild. Replant a large round in autumn and it will often produce a normal divided bulb the next season.
Should I cut garlic scapes off or leave them?
For the largest bulbs, cut hardneck scapes when they have curled into about one loop. Leaving them will not ruin the crop, but energy spent on the flower stalk is energy not spent on the bulb. Use the scapes in the kitchen so nothing is wasted.
How do I know my garlic is cured and ready to store?
After three to four weeks in a warm, dry, airy place, wrappers should feel papery, the neck should feel dry and tight when squeezed gently, and roots should be brittle. If the neck still feels soft or damp, give the bulbs more time and better airflow. Storing garlic too early is a common cause of mould.
Can I replant cloves from my own harvest?
Yes, and many gardeners prefer it once they have a healthy crop. Save the largest, best-formed bulbs, cure them fully, and break them into cloves at planting time. Only save seed from healthy plants; if disease appeared in the bed, buy fresh seed garlic instead of carrying a problem forward.
Final Thoughts
Garlic asks you to think a season ahead, and that is part of its charm. You plant on a cool autumn day as the garden winds down, and you harvest on a warm summer morning when everything else is racing. Start with the right type for your climate, plant plump cloves point-up in a sunny, drained bed, mulch for winter, weed and water in spring, and lift when half the leaves have turned. Repeated each year with your own saved seed, those habits will give you garlic fresher and more varied than anything in a supermarket net.